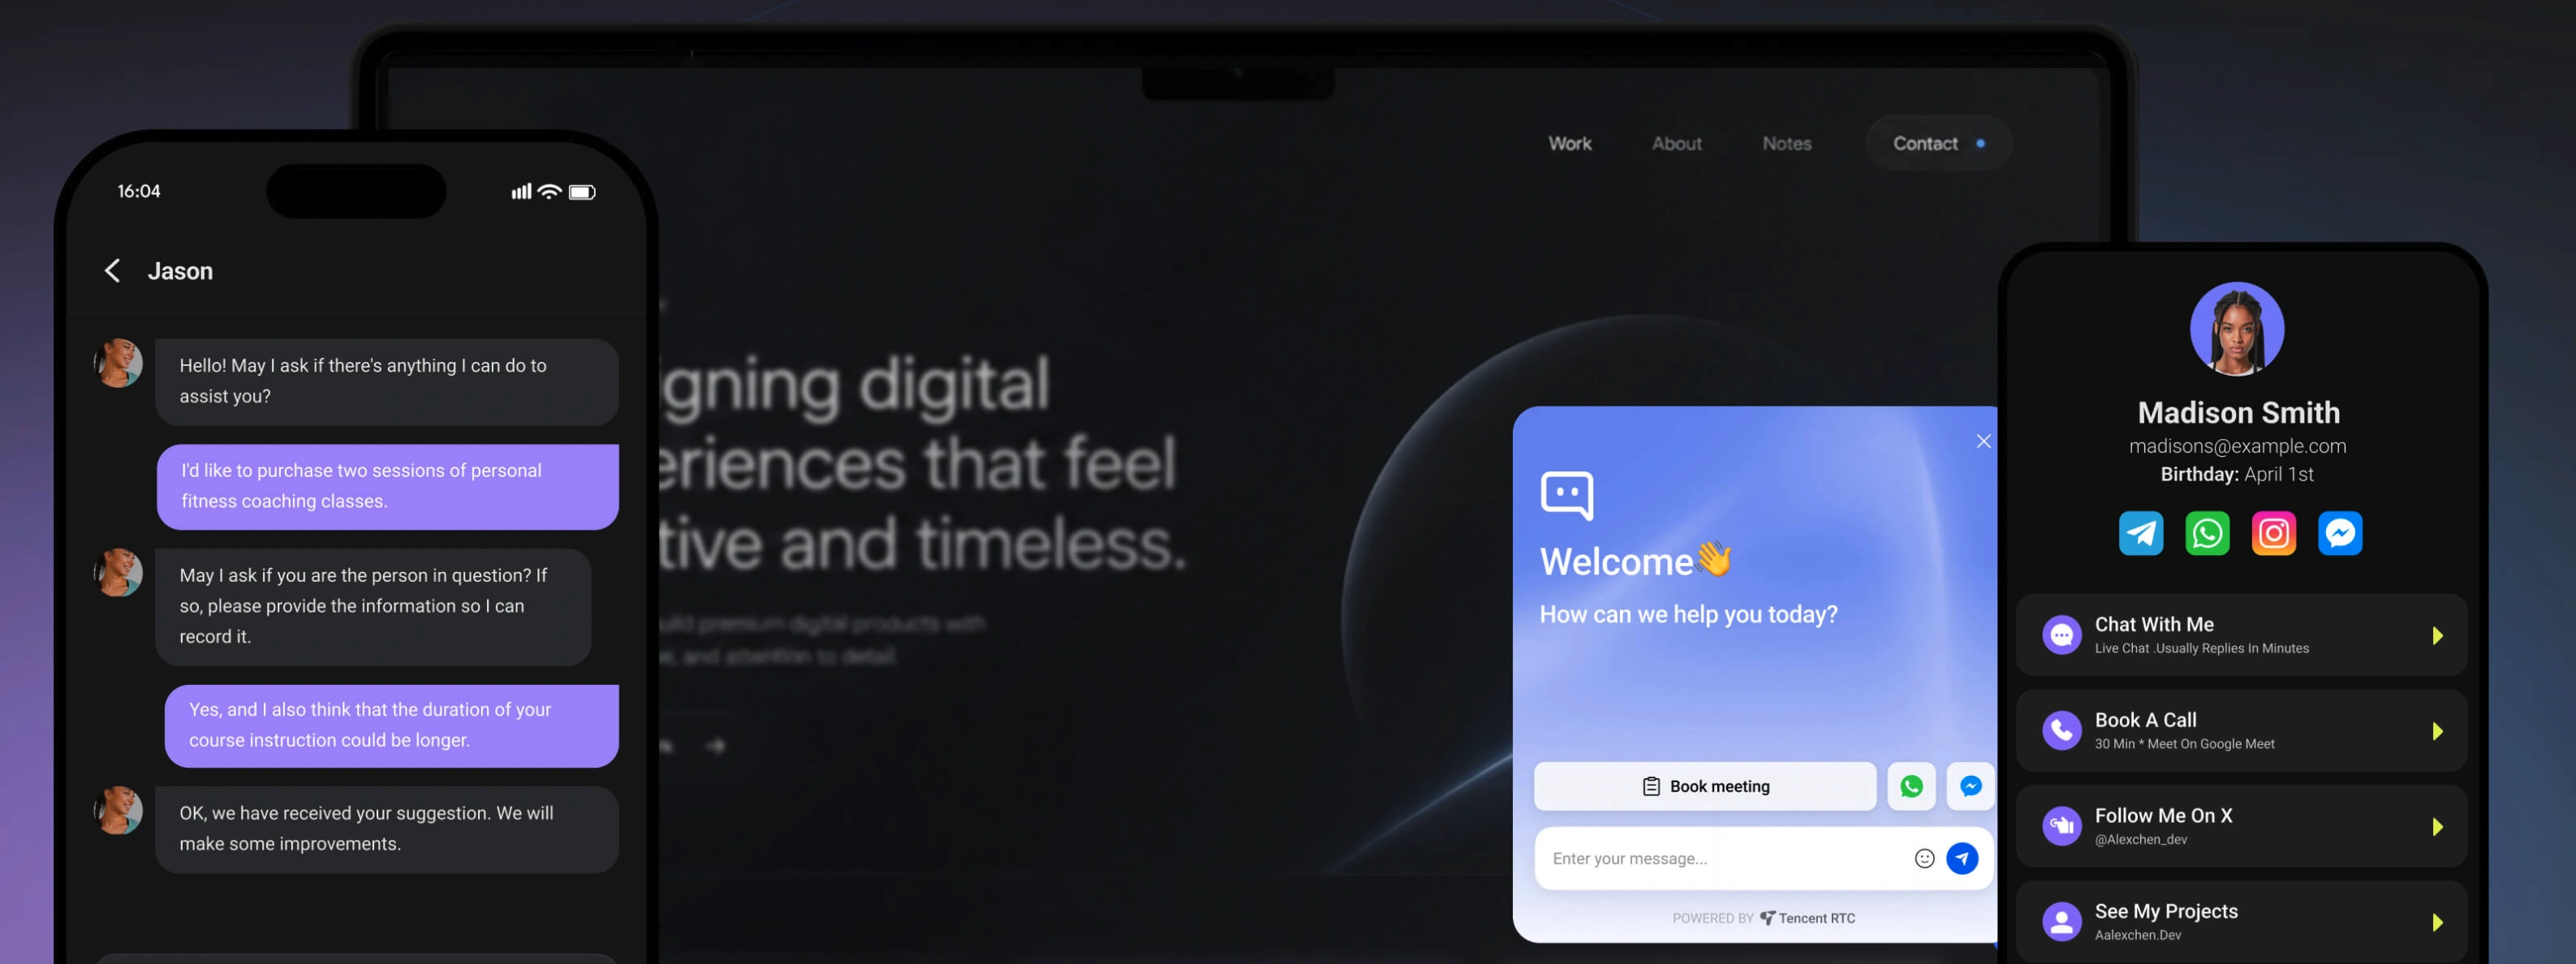
The three product forms
| Form | What it is | Where it lives | Install time |
|---|
| Web Widget | A floating chat bubble on a website | Any site with a </body> tag | ~1 minute |
| Contact Page | A shareable link that looks like a profile page | knocket.com or a custom domain | ~1 minute |
| Mobile Widget | A chat bubble inside a native app | iOS, Android, React Native, Flutter apps | ~2 minutes |
The three forms are independent. A founder can ship the contact page on day one, the web widget on day seven, and the mobile widget when the app launches — without rebuilding any setup.
Who is Knocket built for?
Knocket is built for the kind of team that does not have a support team yet.
- Independent developers and indie hackers — a small SaaS, an open-source tool, or a side project that needs a way for early users to reach them.
- Early-stage founders looking for the first 100 users — pre-PMF teams that need to read every message and reply like a human.
- Small product teams running lightweight feedback loops — teams that want qualitative feedback without spinning up a customer service platform.
Knocket is built for the moment when the founder is the entire support team. That moment is the one Knocket optimises for.
How do I install and customize the Knocket Web Widget?
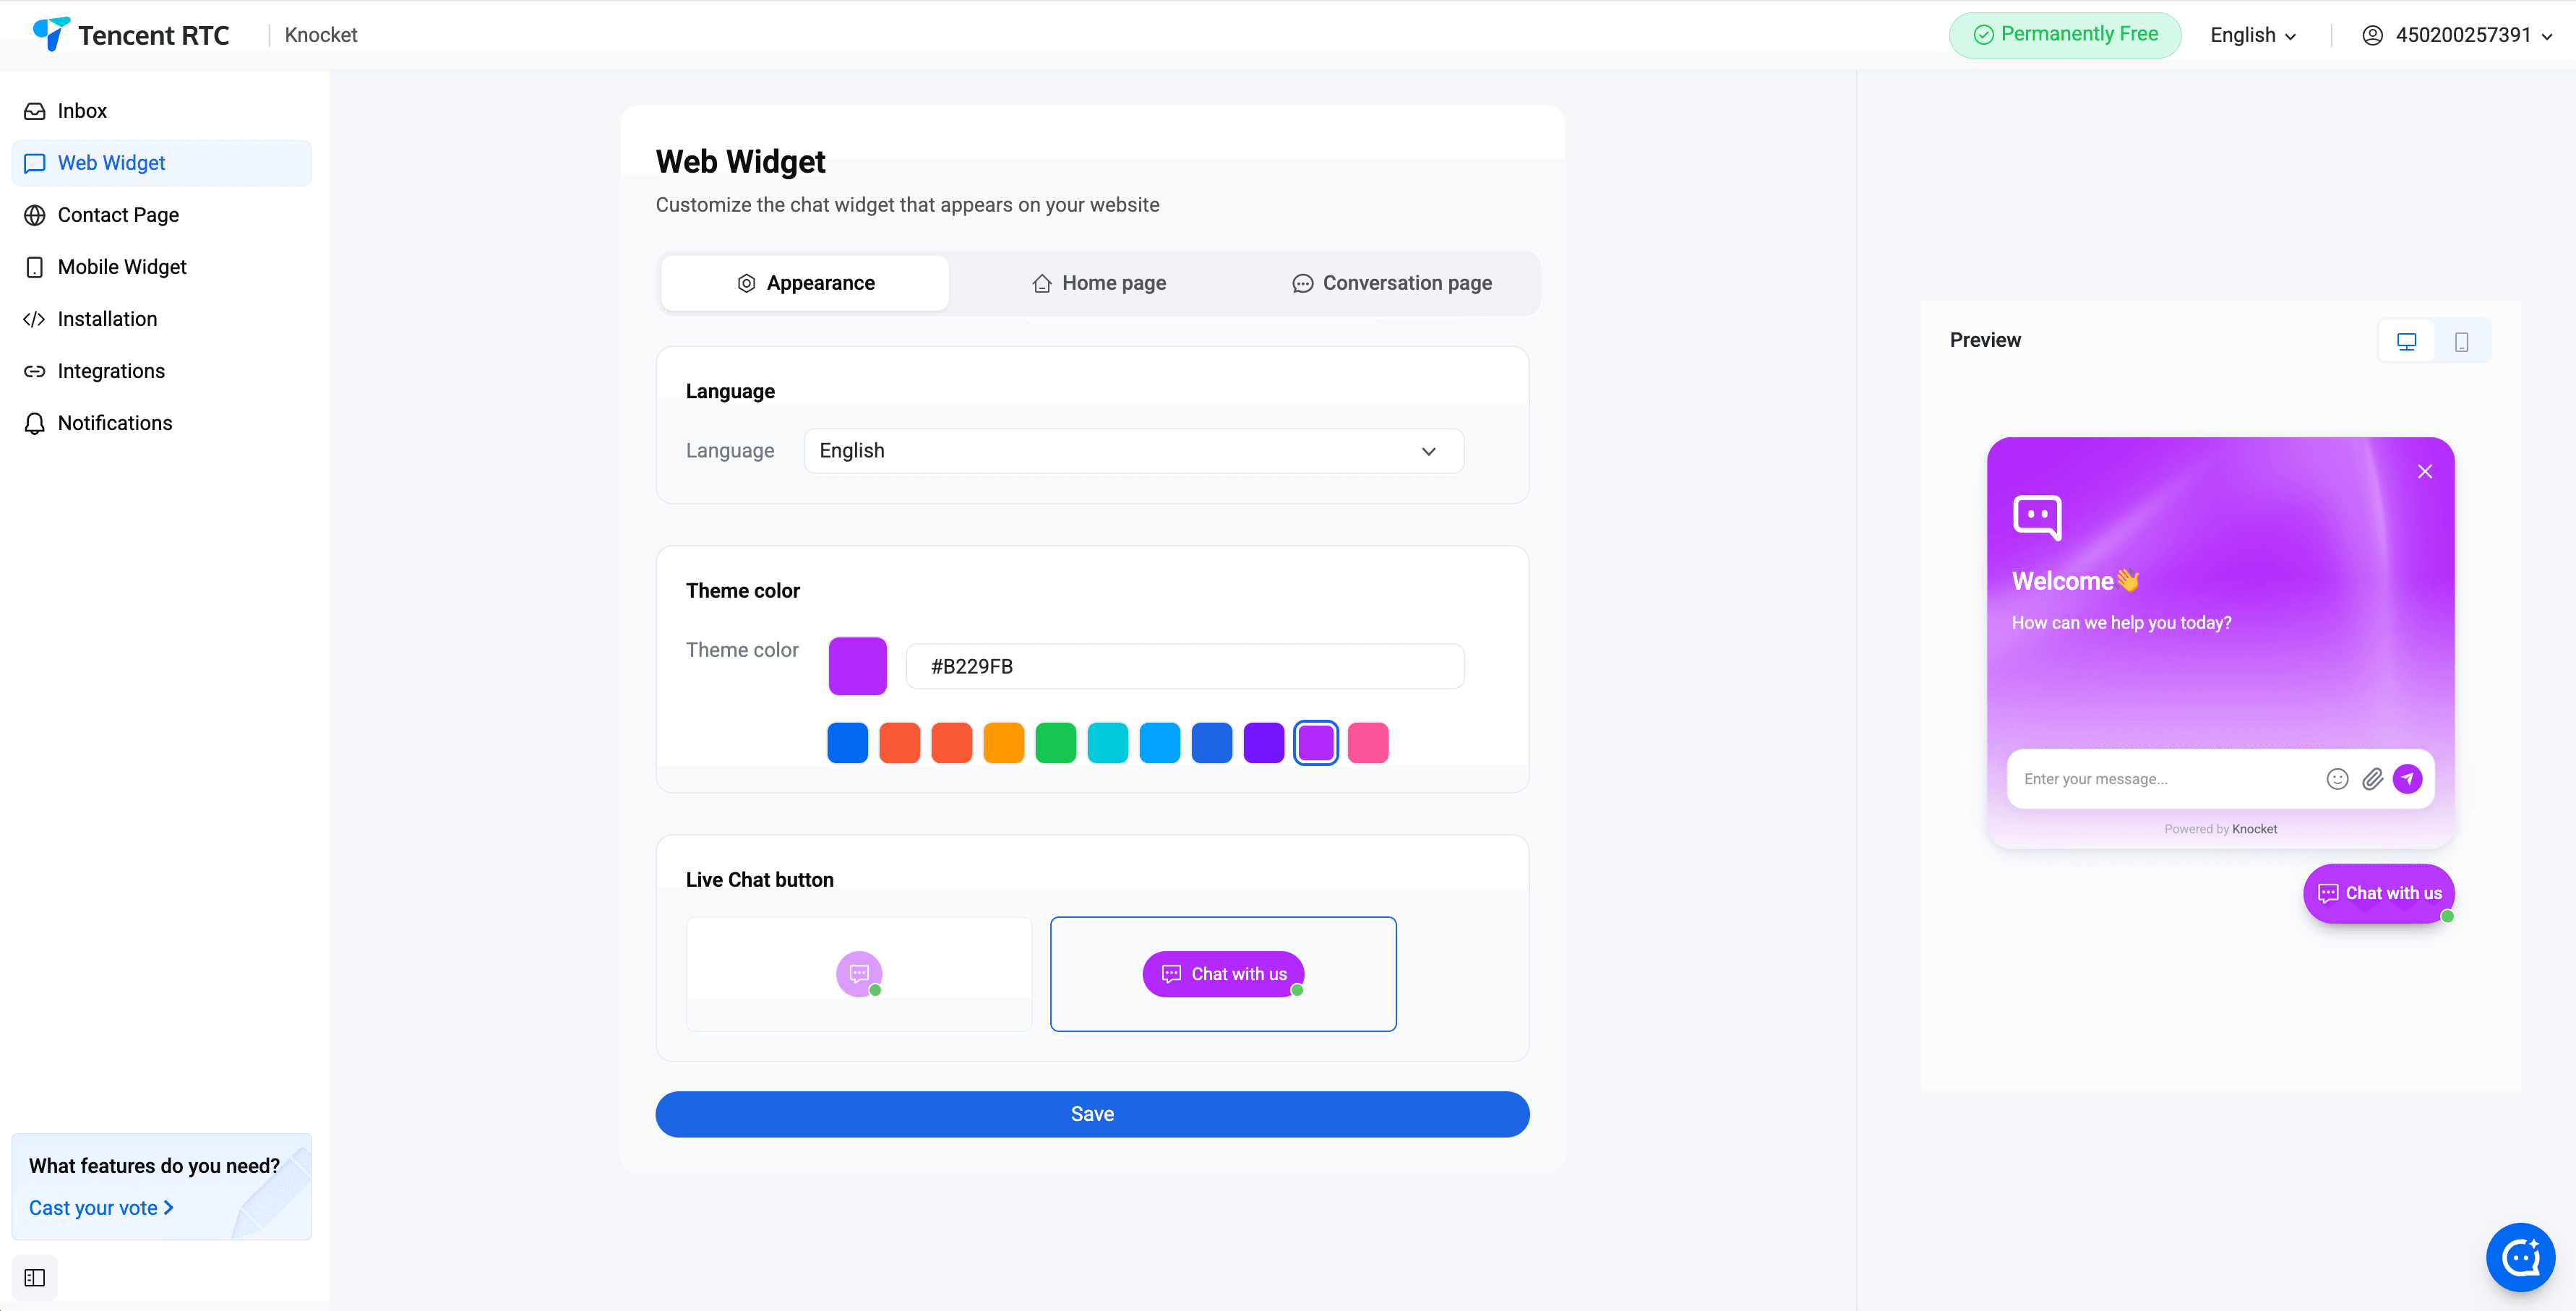
The web widget is fully customizable from the Knocket console, and every change previews in real time.
Theme color, logo, and avatar
Pick a primary color that matches the brand. The widget renders the launcher bubble, the header, the input field focus ring, and the send button in the chosen color. Upload a brand logo to appear in the widget header, and upload an avatar to represent the founder on the other side of the chat. Both assets are optional; the widget falls back to a clean text-only header if neither is provided.
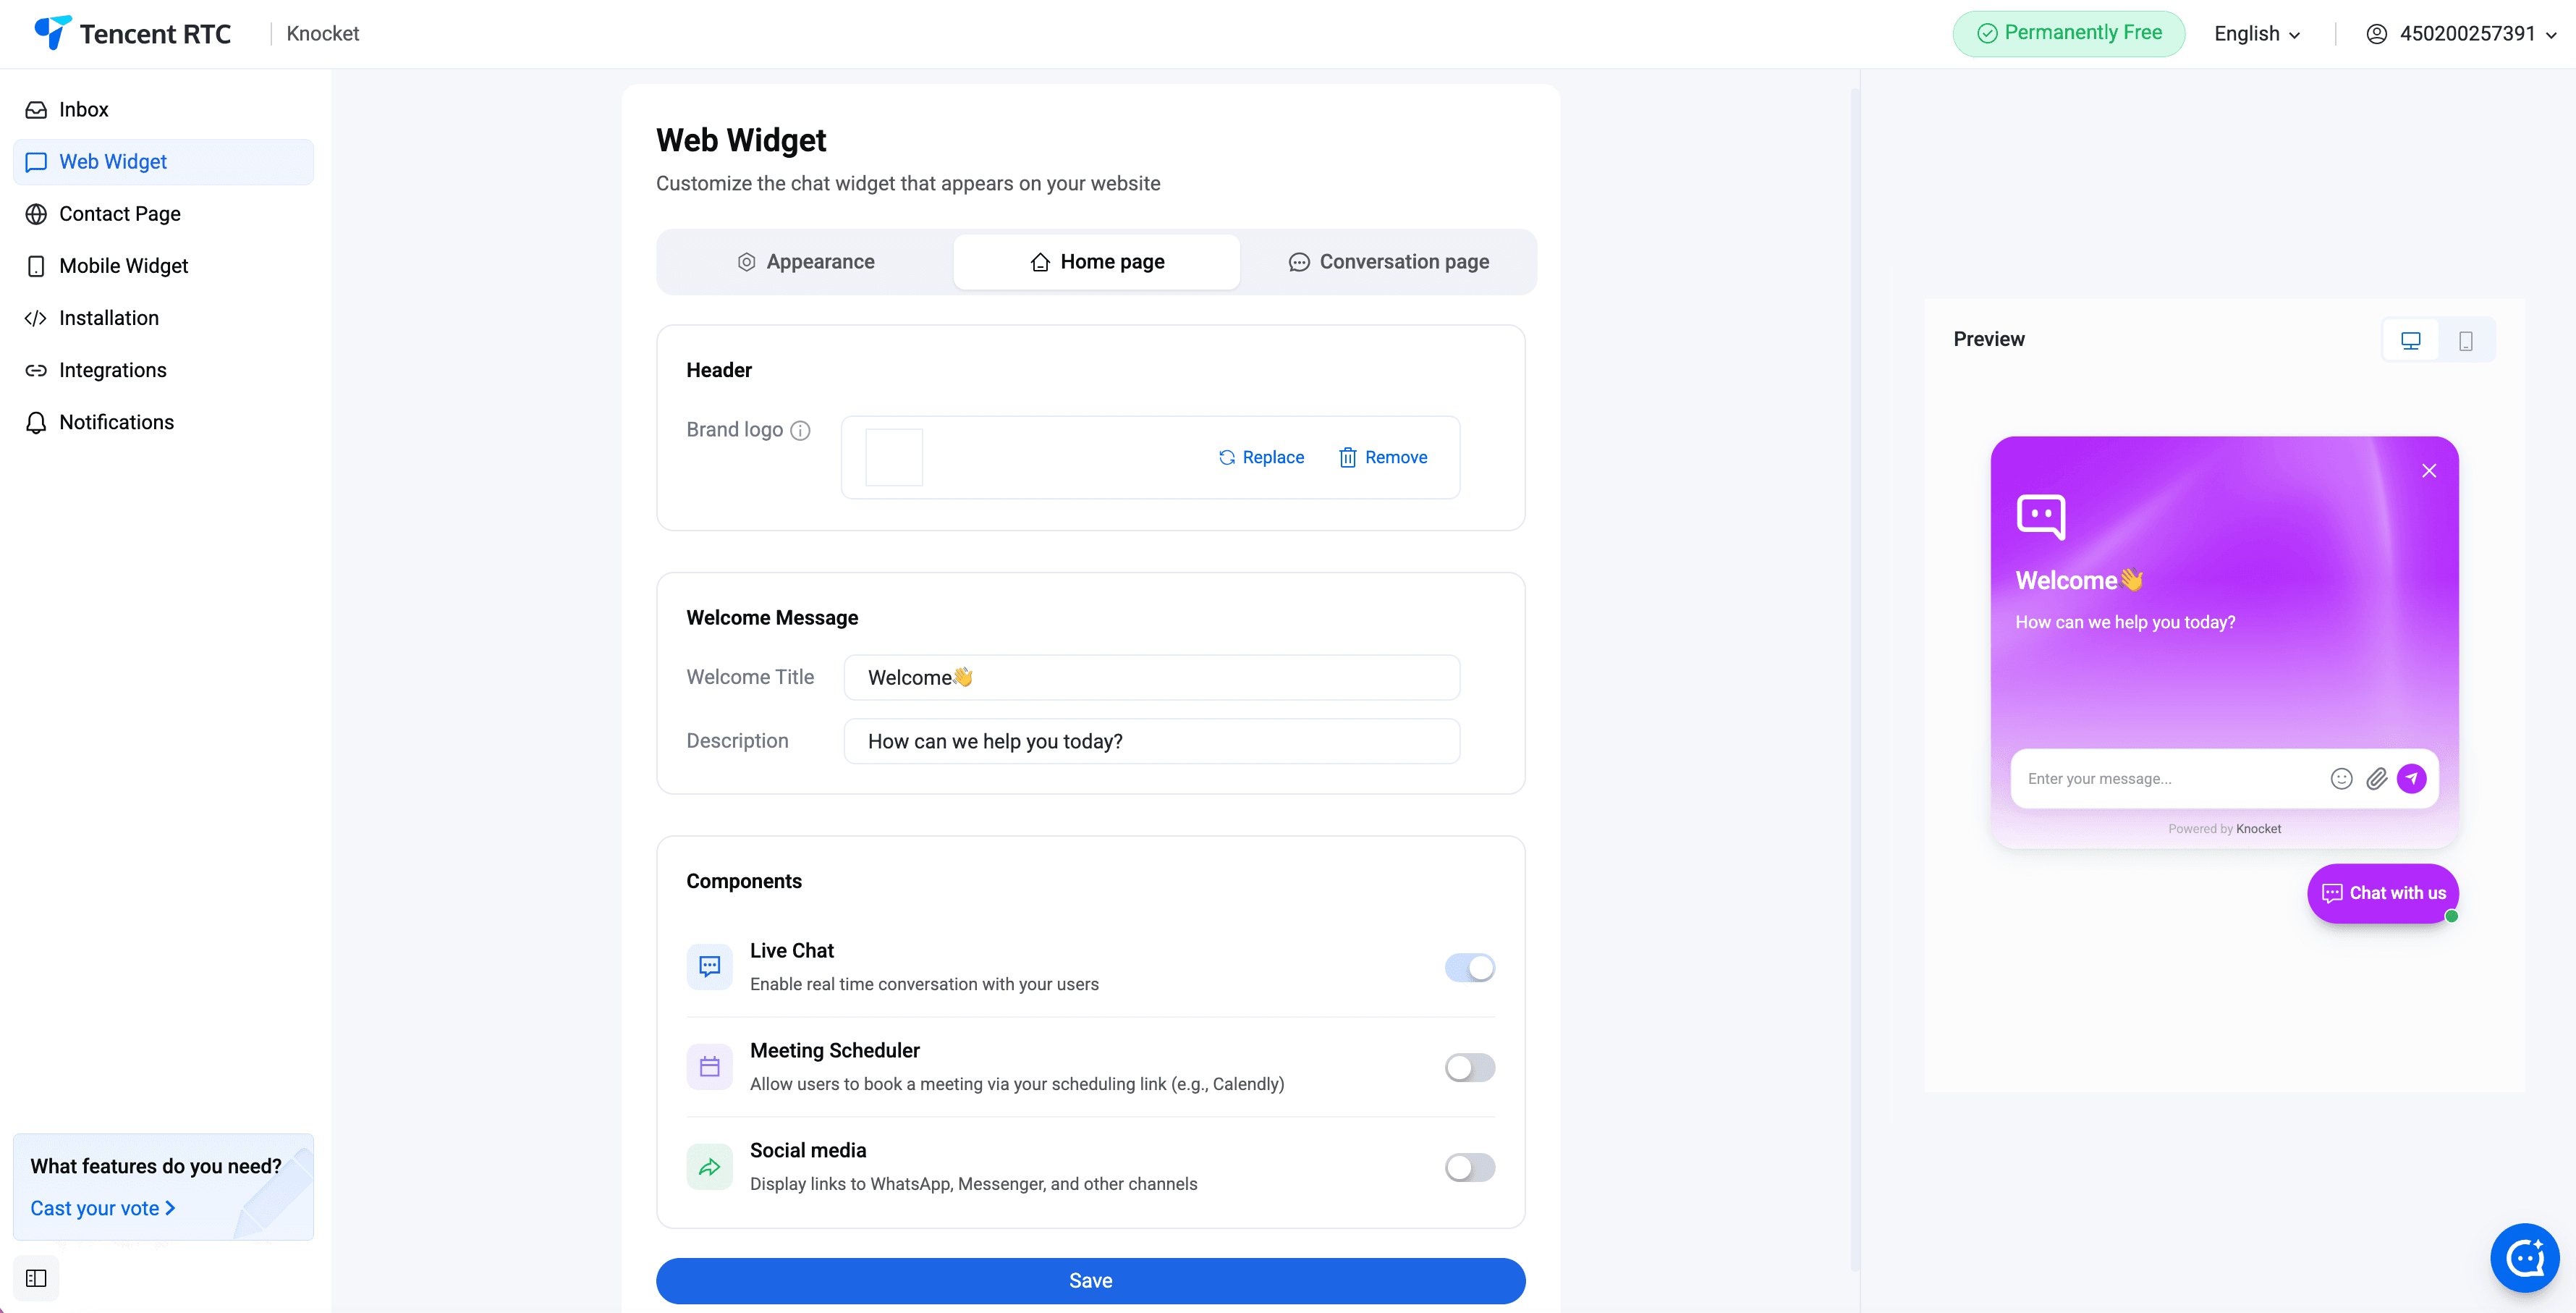
Welcome message and welcome header
The welcome header is the first sentence a visitor reads when the widget opens. The welcome message is the body copy under the header. Both are short, both pre-fill, and both can be A/B tested from the console.
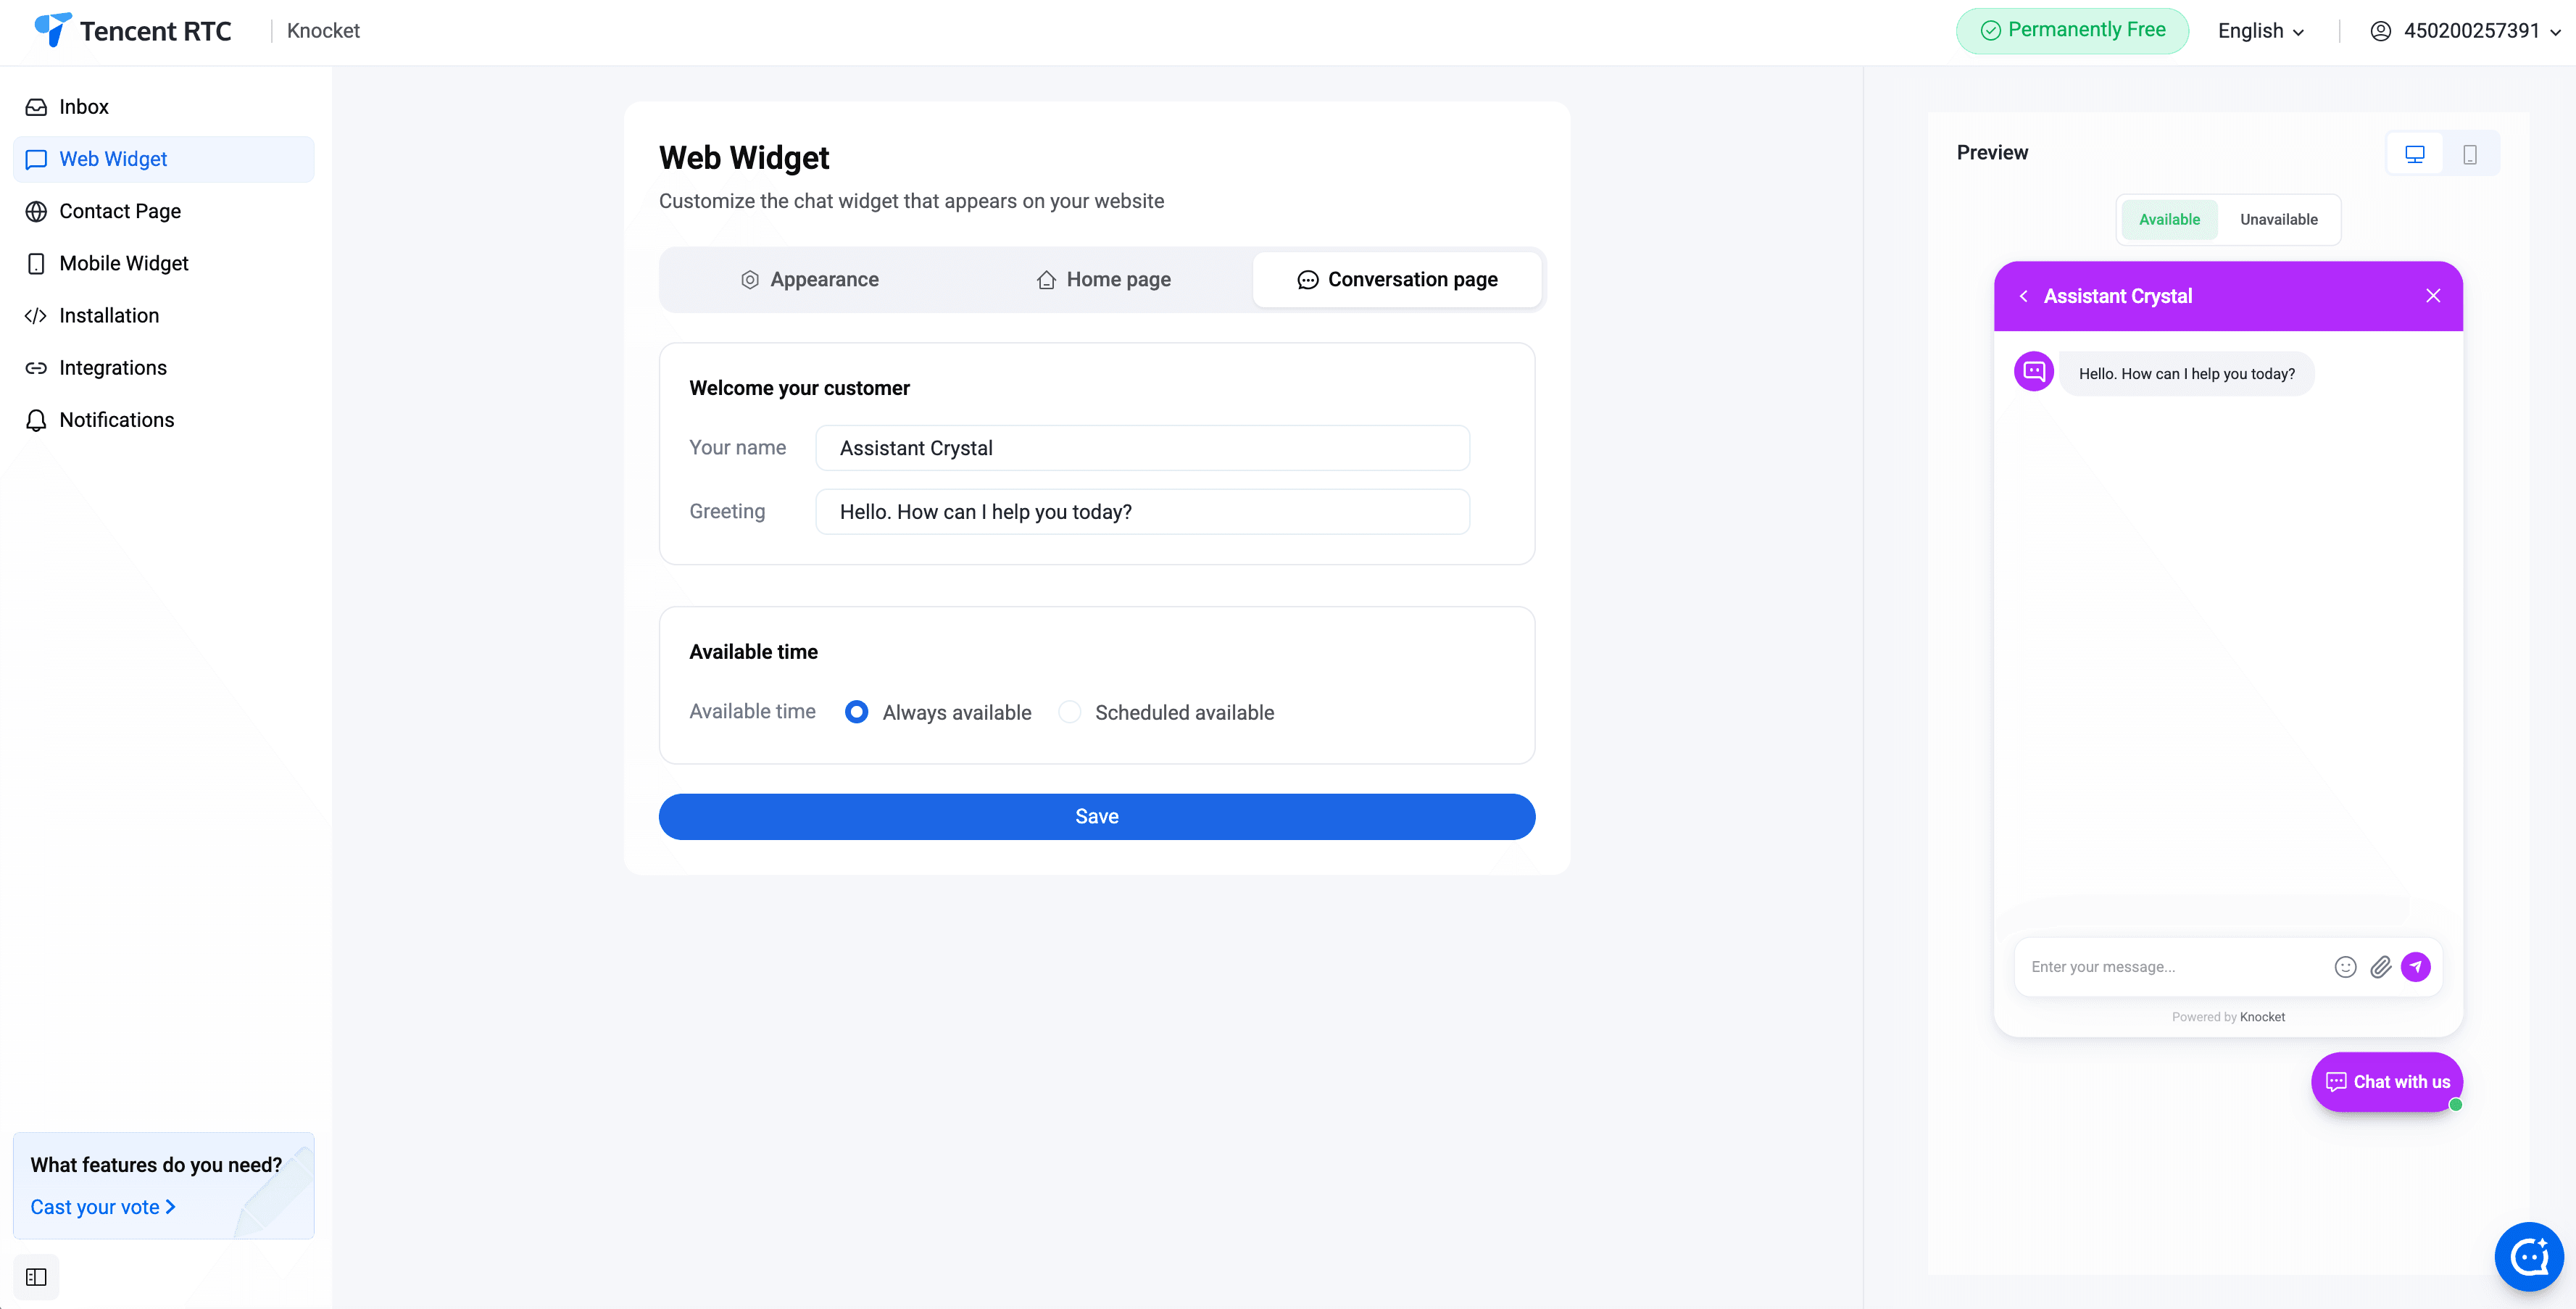
Proactive greeting
Turn on proactive greetings to show a short welcome message to first-time visitors after a configurable delay. Proactive greetings are the easiest way to convert a passive visitor into an active conversation.
Social link aggregation
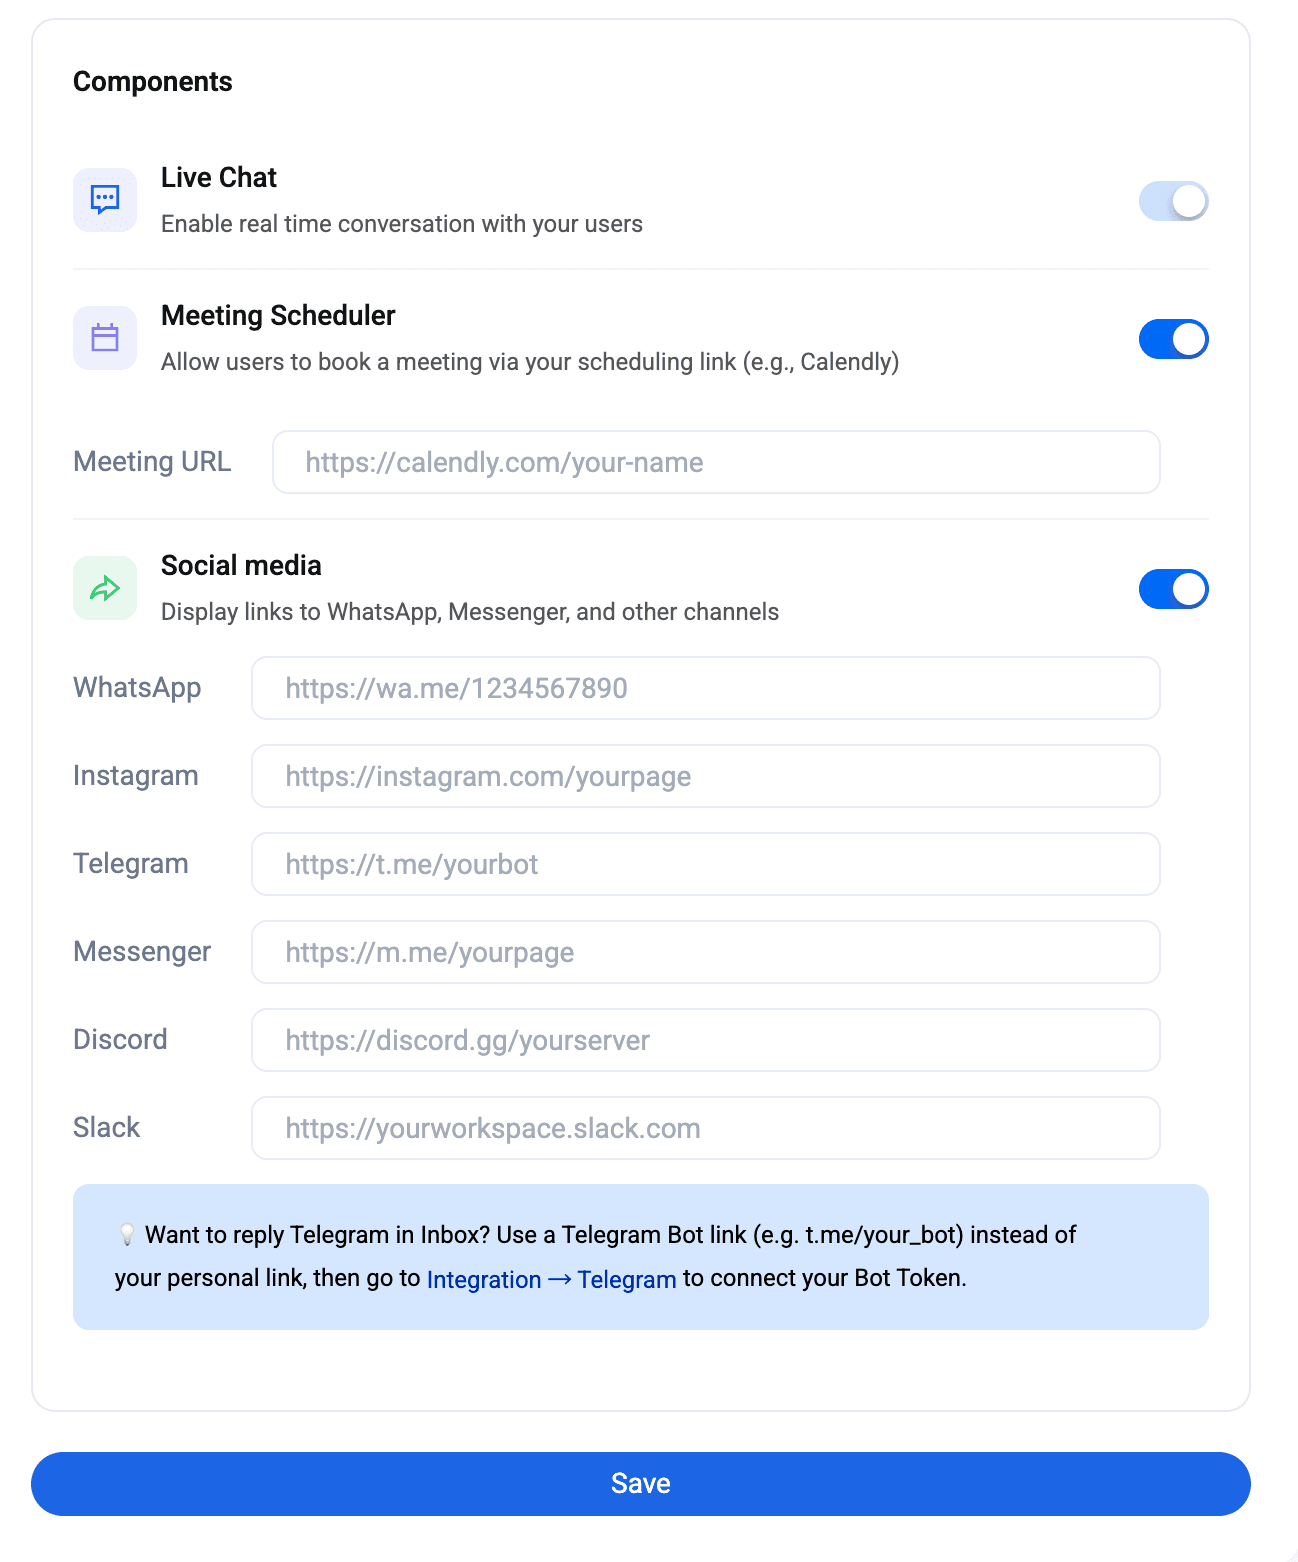
Add links to the team's WhatsApp, Instagram, Telegram, and Messenger accounts. The widget renders those links as alternative contact channels when the visitor prefers them over typing a message.
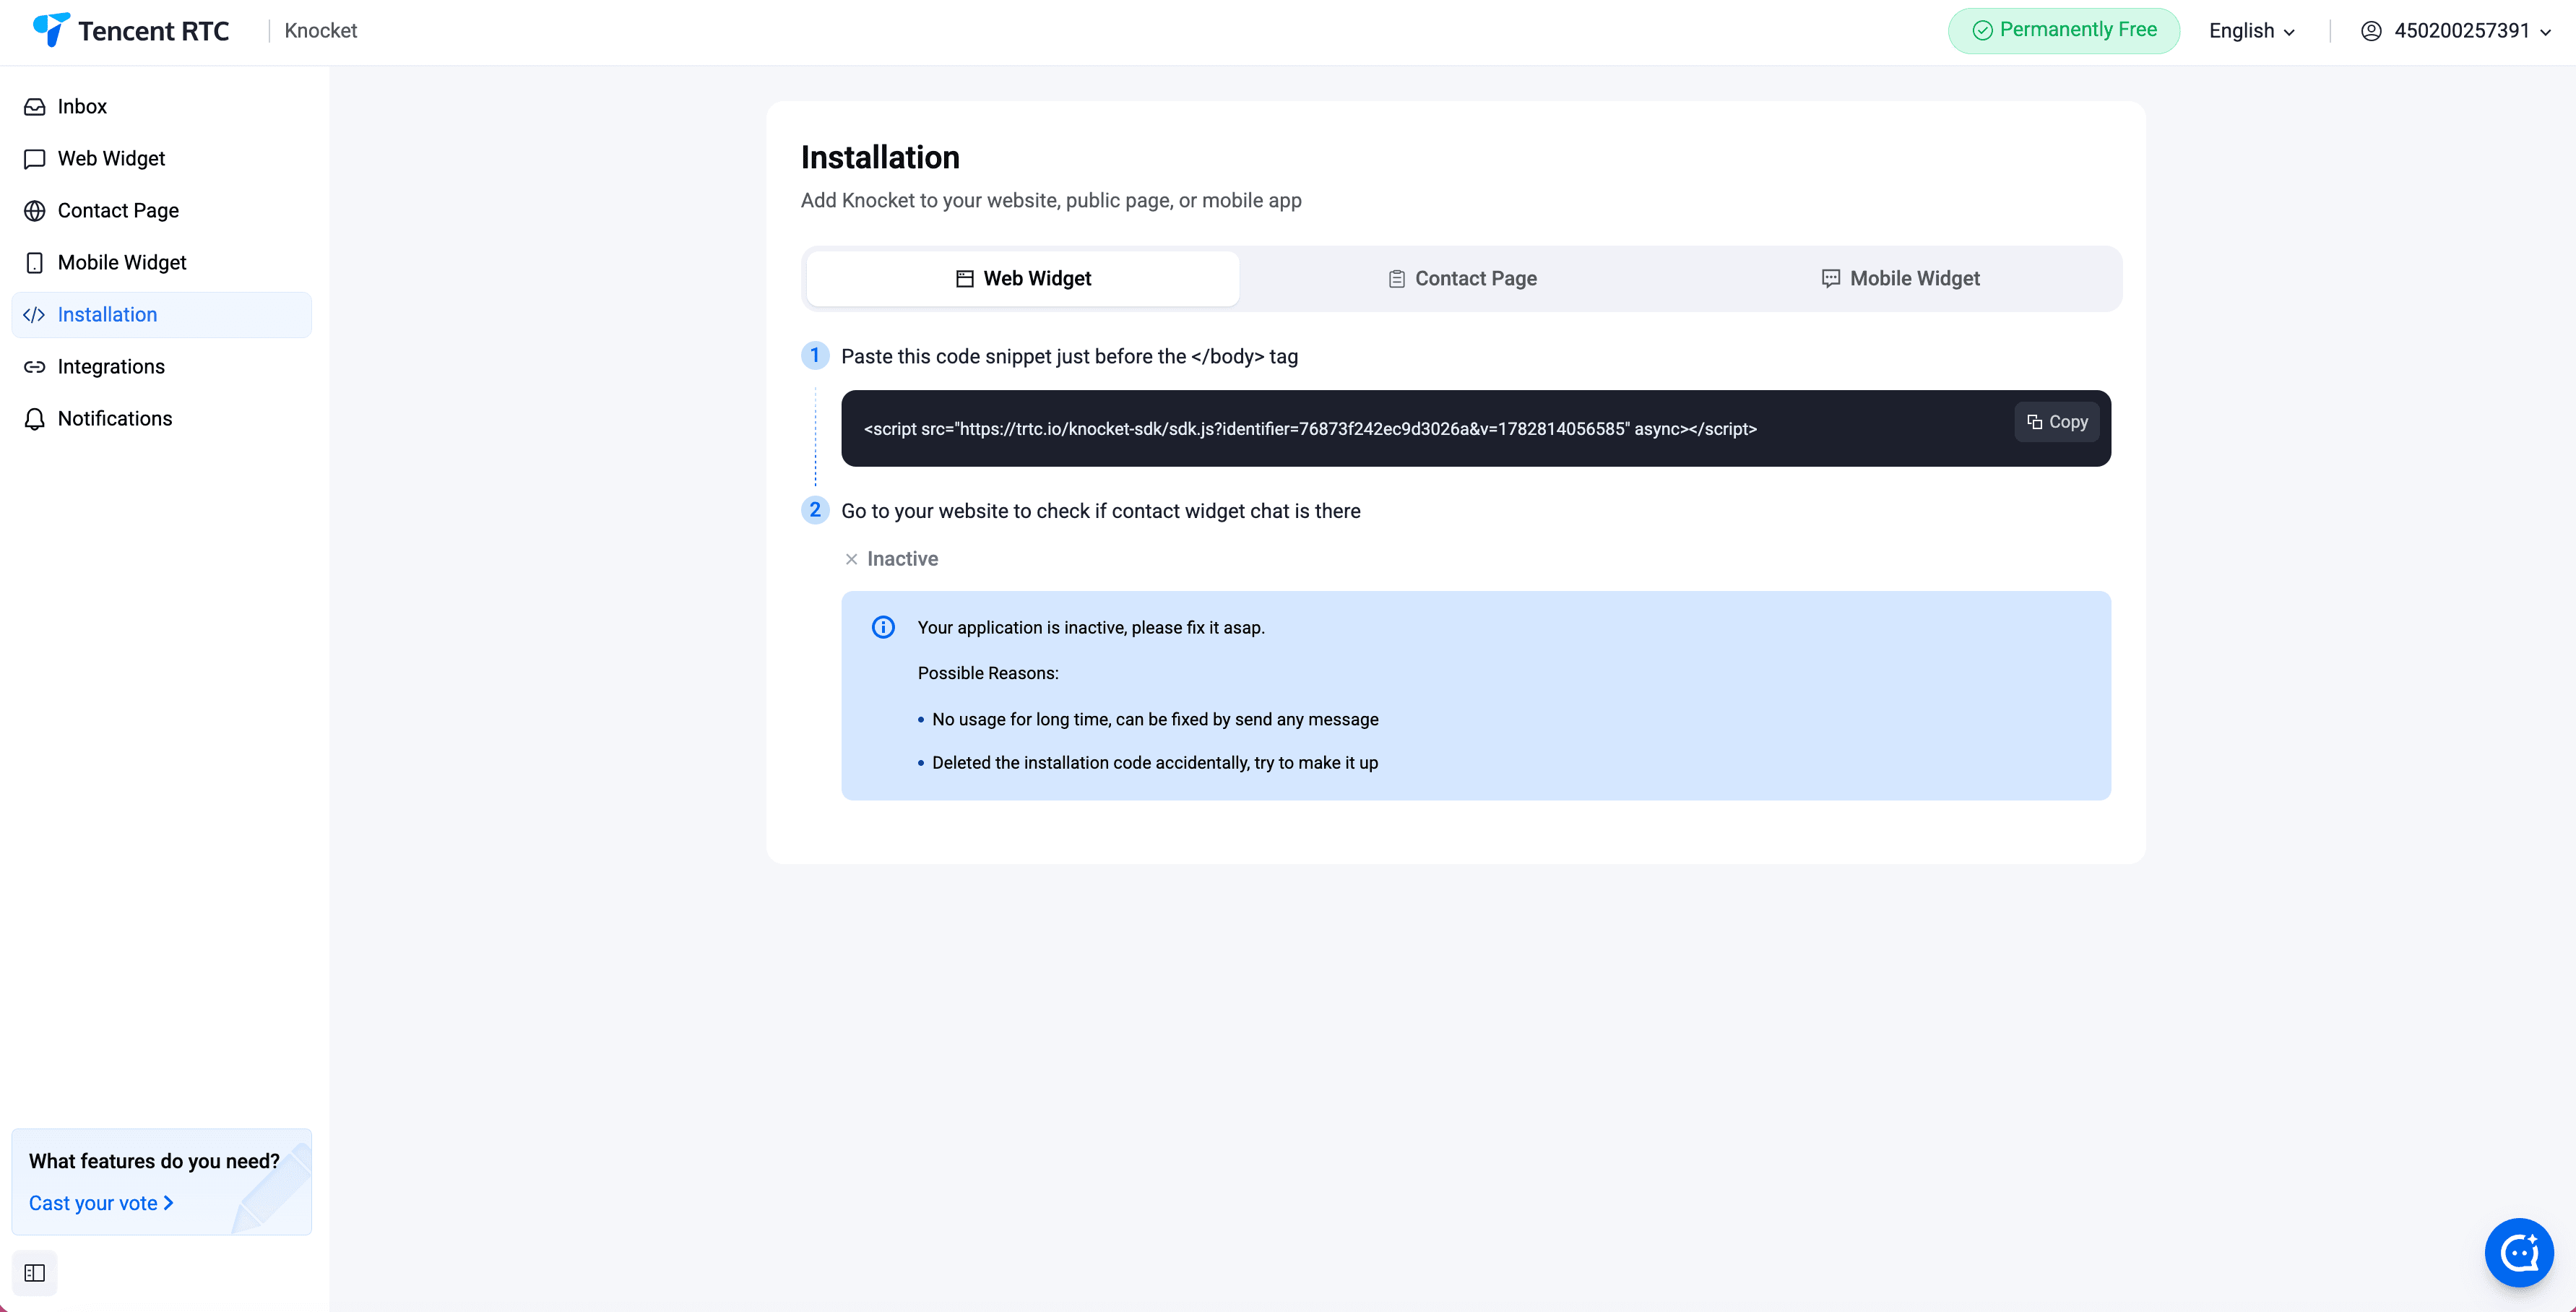
Tip → For developers who want more control, the Knocket SDK reads a small global object at load time. Set custom user IDs, pass session context, or override the launcher position by declaring window.knocketConfig before the script tag.
How do I publish a Knocket Contact Page?
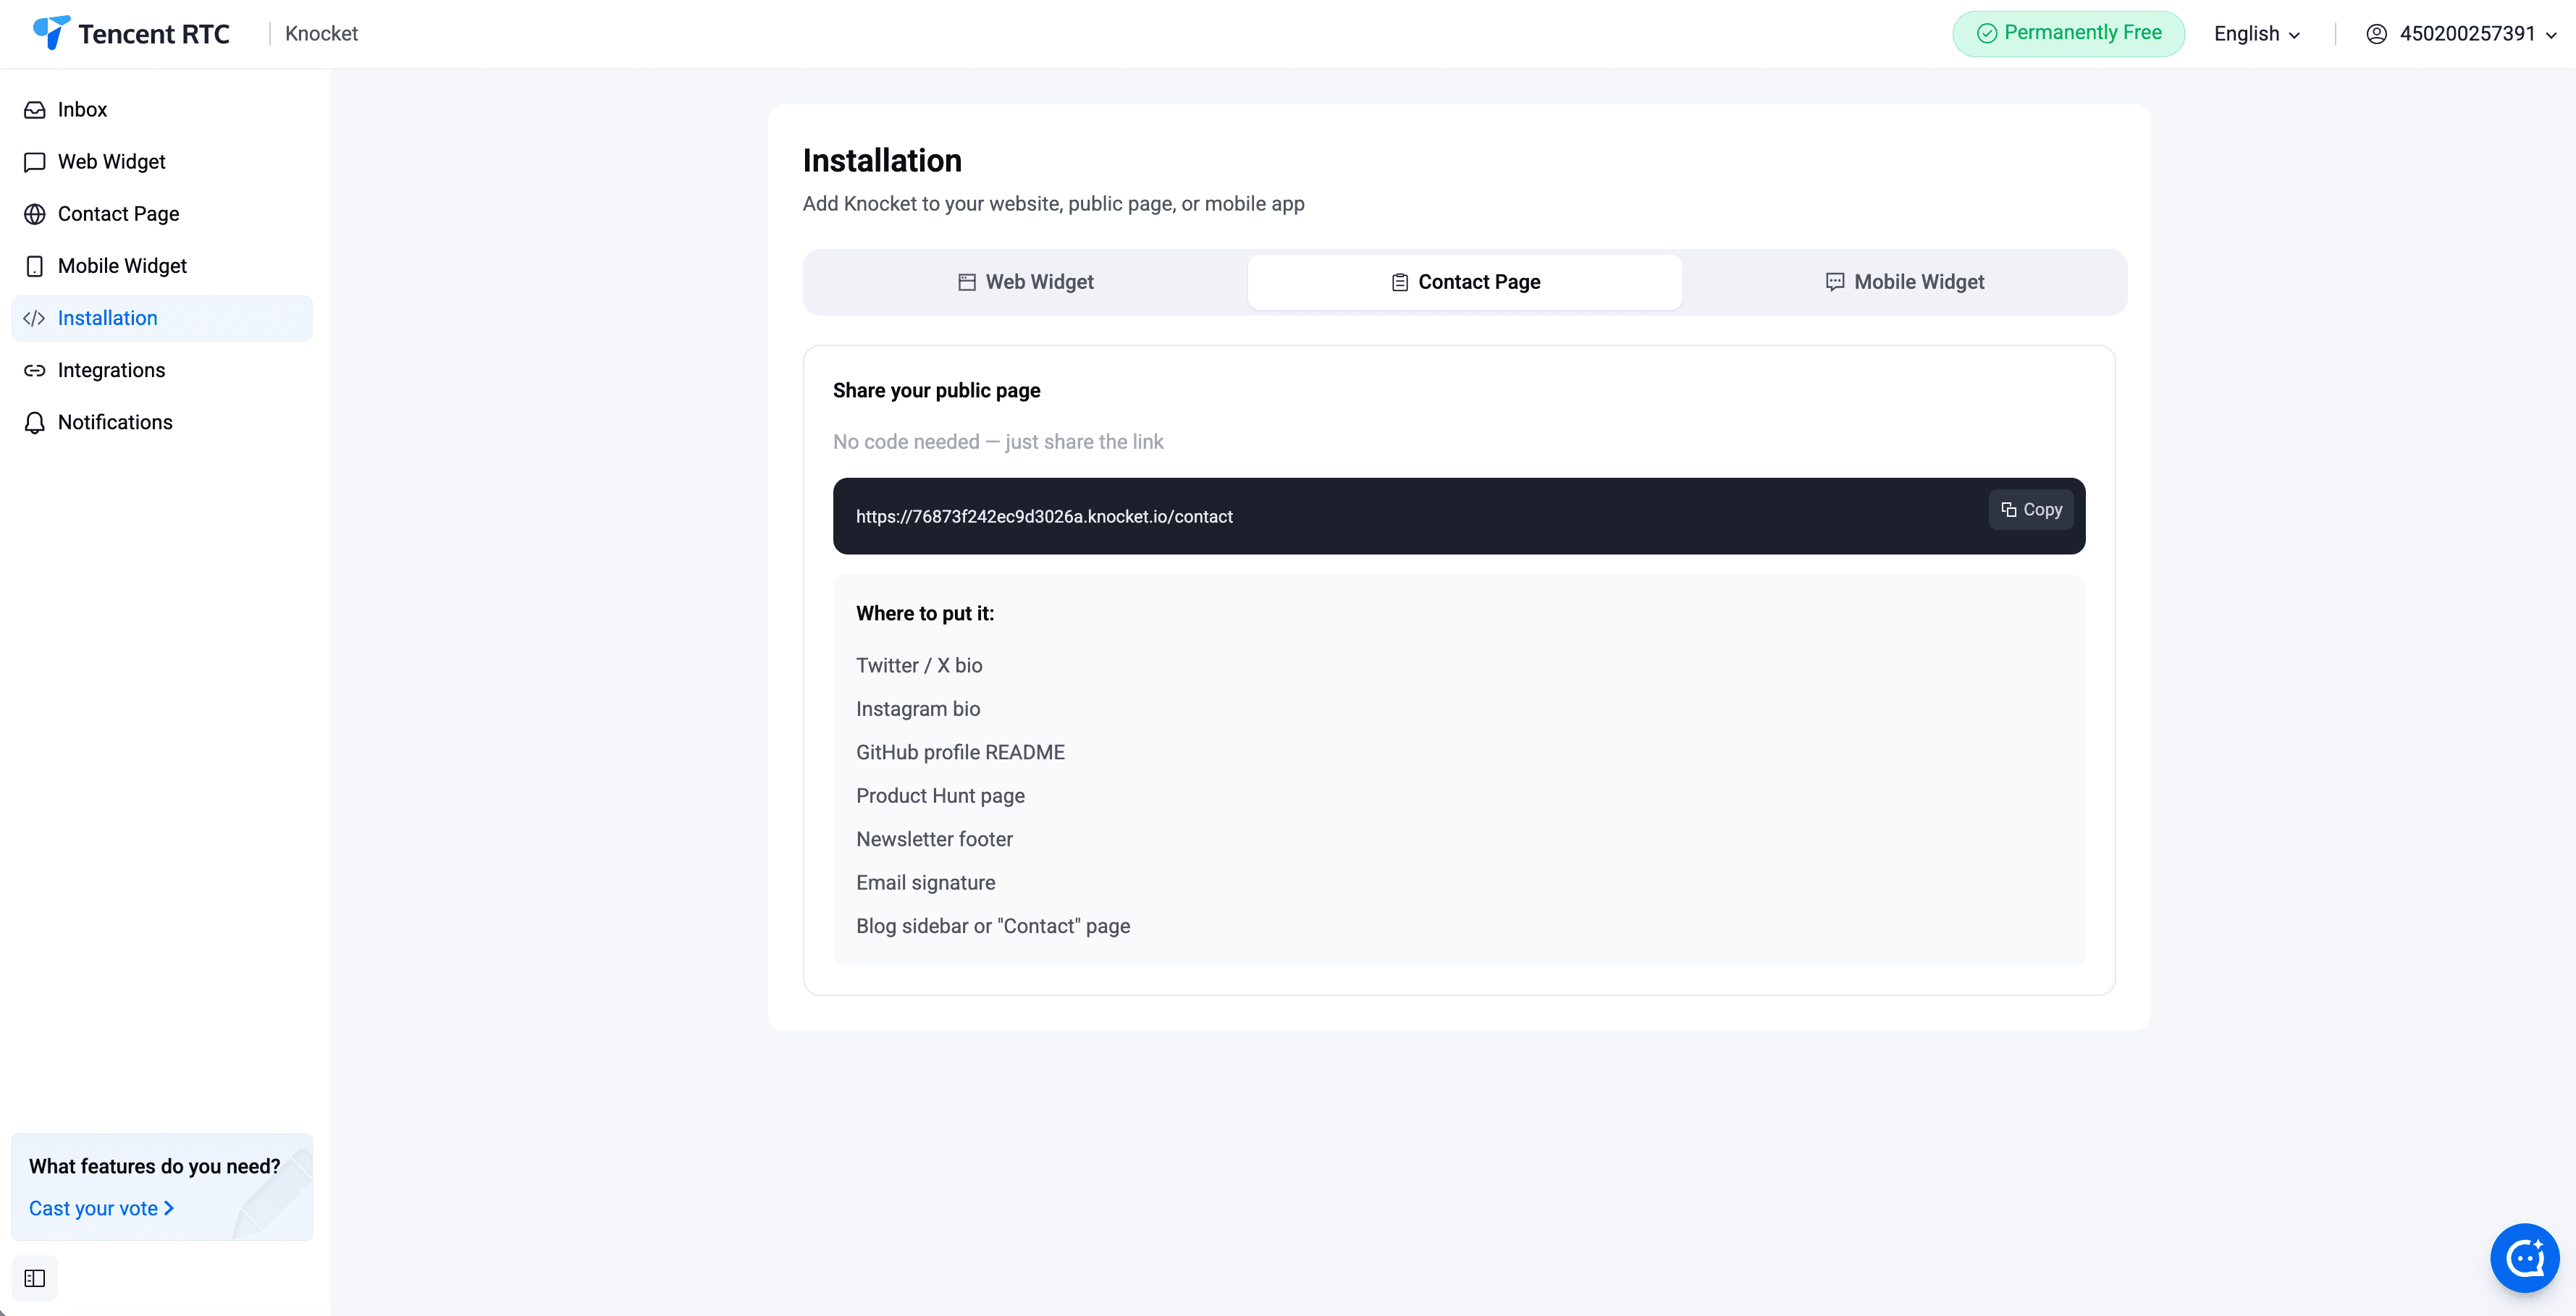
The contact page is the form to ship when there is no website, when the website is not ready, or when the contact link needs to live in a bio. A contact page is a shareable URL that looks like a profile page and acts as a contact form, a social link hub, and a chat entry point.
Step 1: Create a contact page in the console
In the Knocket console, open Contact Pages → New, name the page, and pick a slug. The slug becomes the public URL.
Step 2: Configure the page
Fill in the visible fields:
- Avatar — a profile photo
- Display name — the name shown on the page
- Bio — one or two sentences about who is behind the page
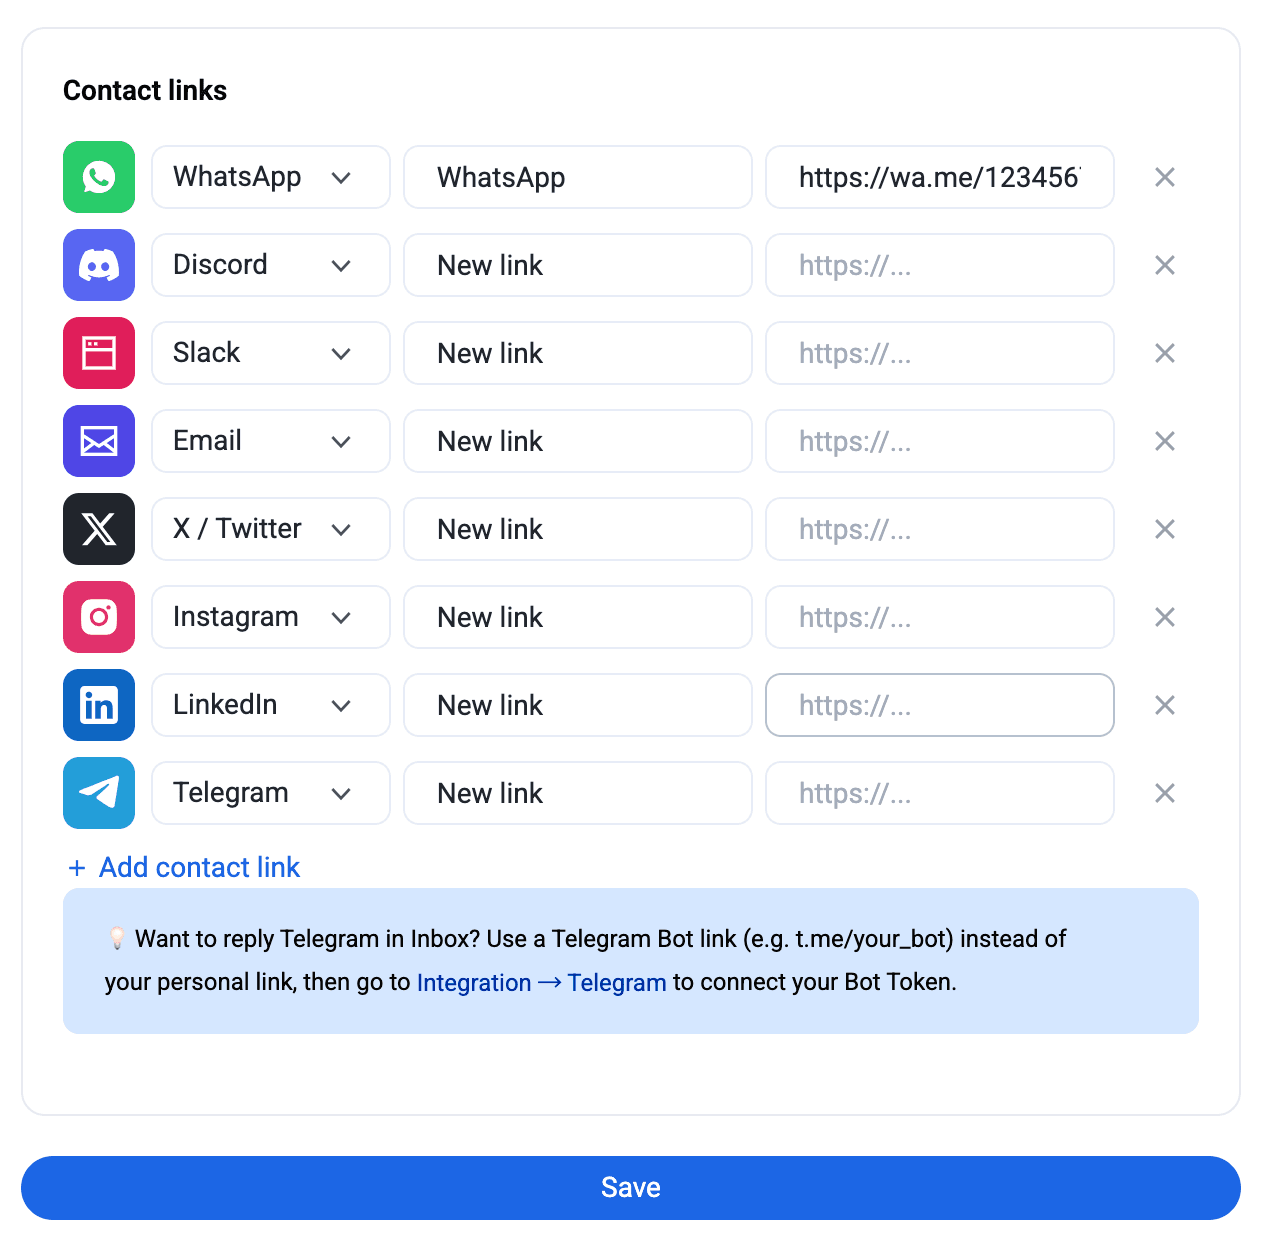
- Social links — Instagram, X, LinkedIn, YouTube, GitHub, WhatsApp, Telegram, Messenger, and a personal website
- Email address — for direct email inquiries
- Phone number — optional, for direct calls
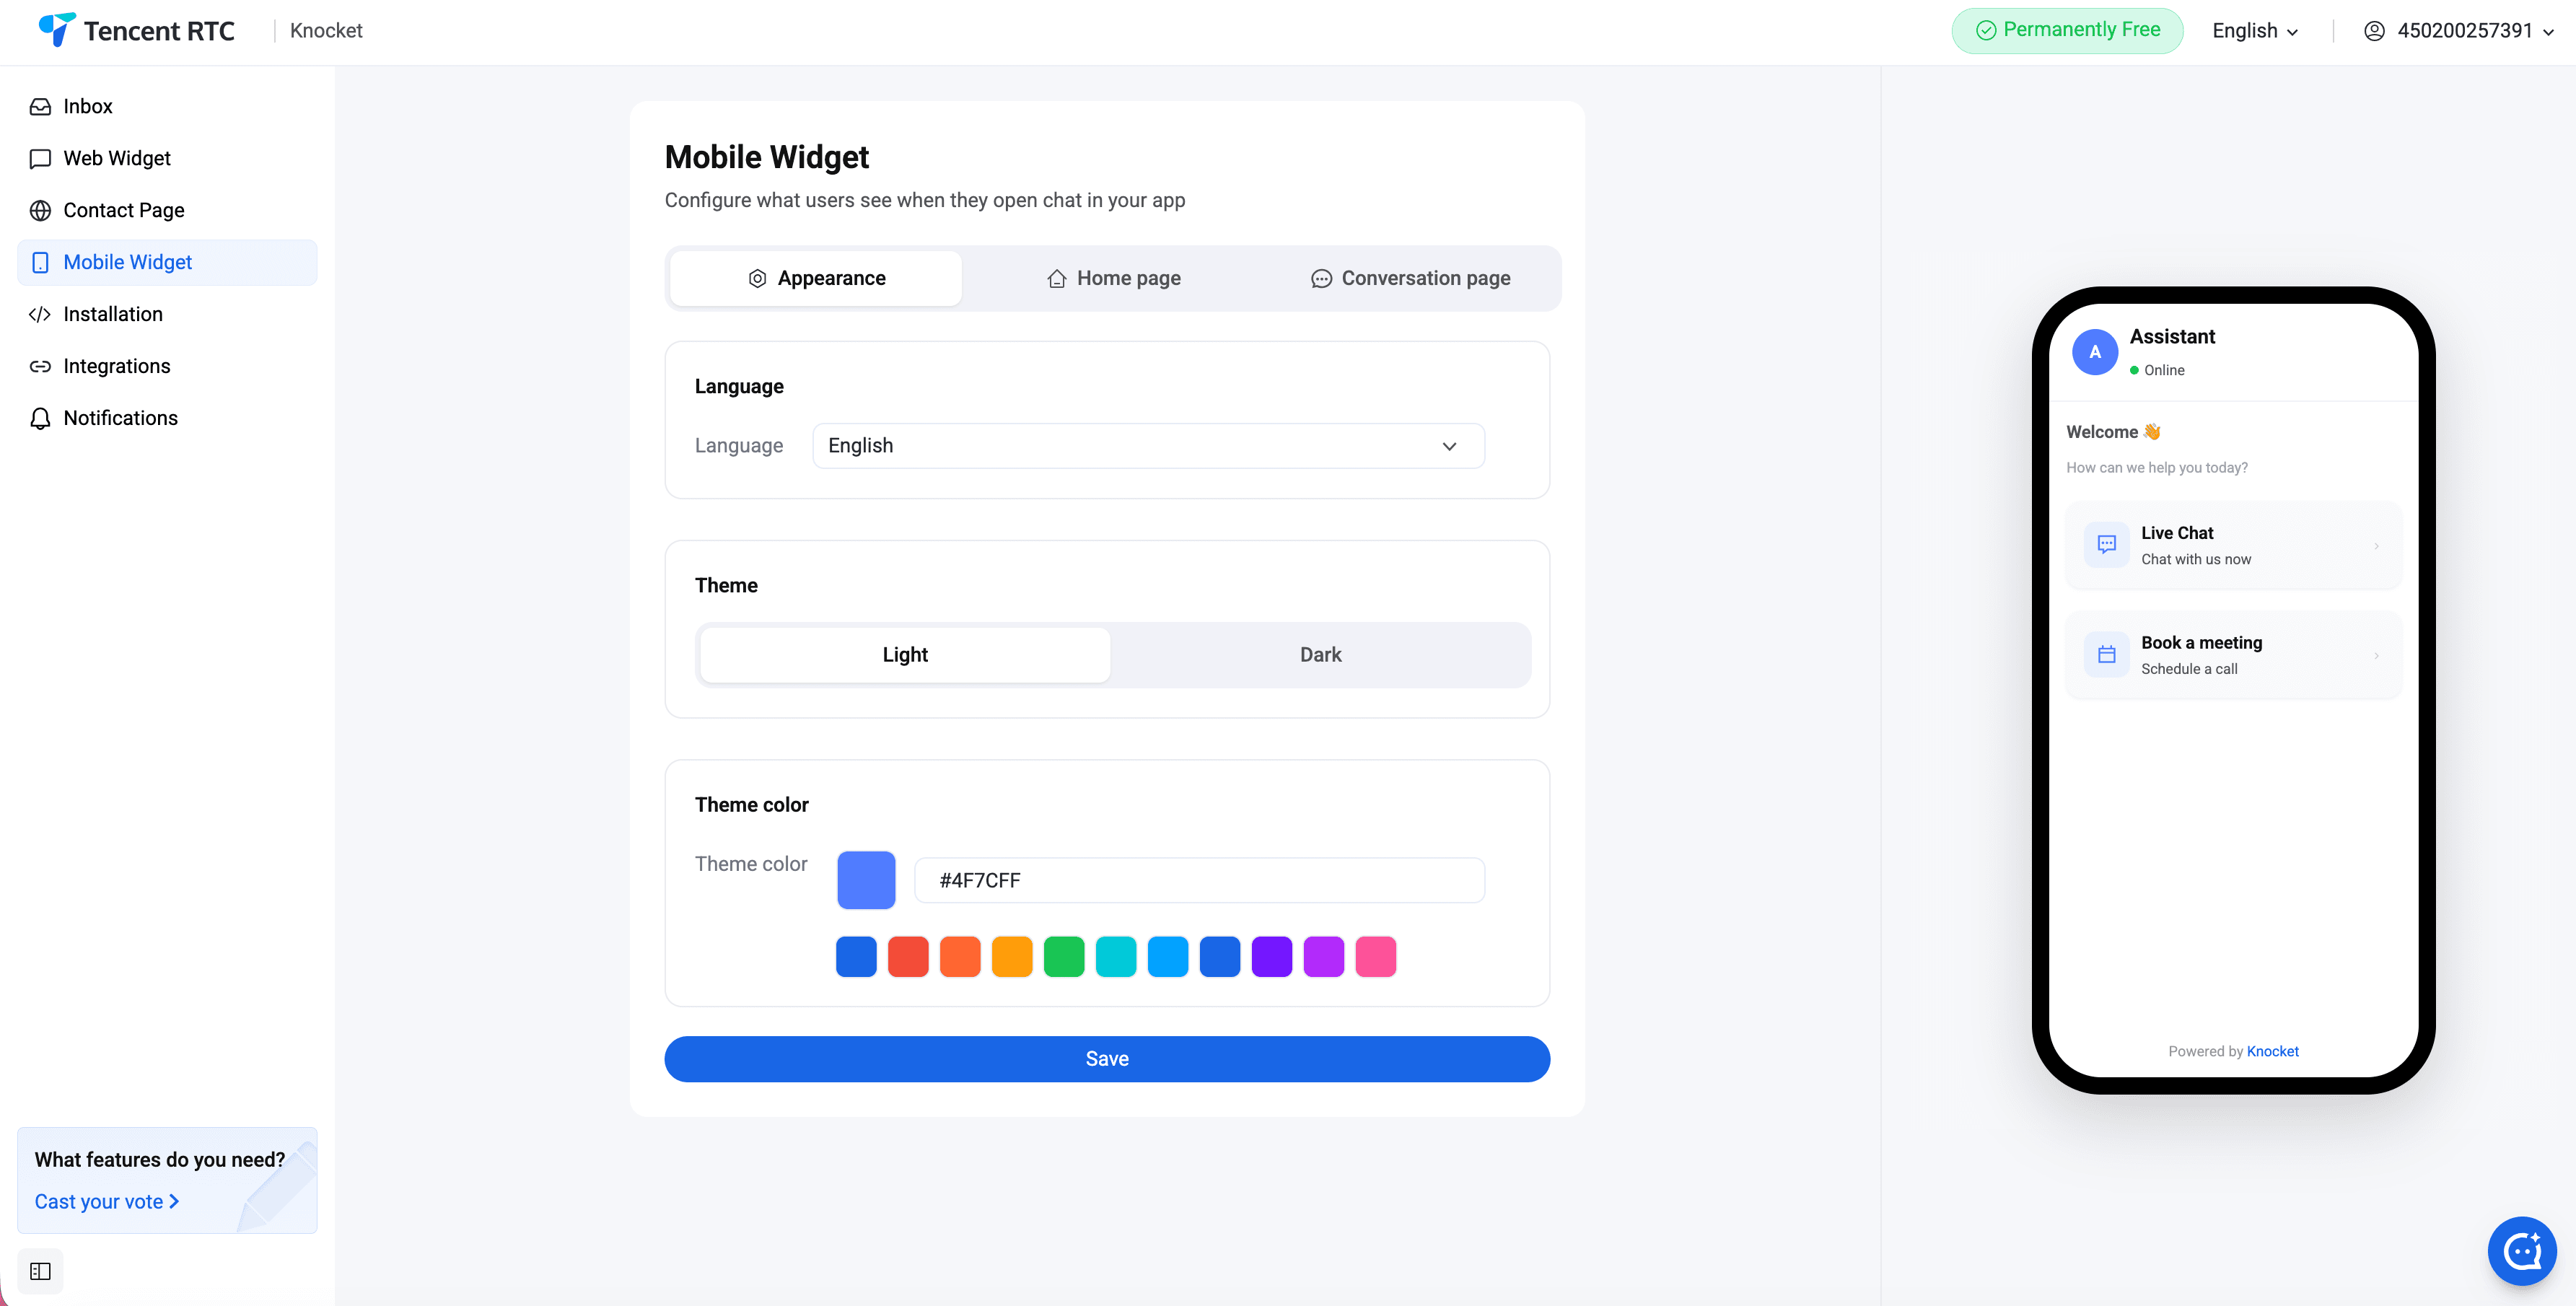
- Theme color — match the brand
Every field is optional. The page works even if only the display name and a single social link are filled in.
Step 3: Publish and share
Click Publish. The contact page goes live at https://knocket.com/p/your-slug. Share the link in any bio, post, or DM.
Where to share a contact page
A contact page fits almost anywhere a founder needs a single, stable link:
- Link in bio (Instagram, TikTok, X, LinkedIn)
- Contact form replacement
- Waitlist page
- Coming soon page
- Newsletter signup
- Beta registration
- Feedback collection
- Customer support page
- Demo request
- Hiring contact
- Sponsorship or press inquiries
- Freelancer intake
How do I embed Knocket into a mobile app?
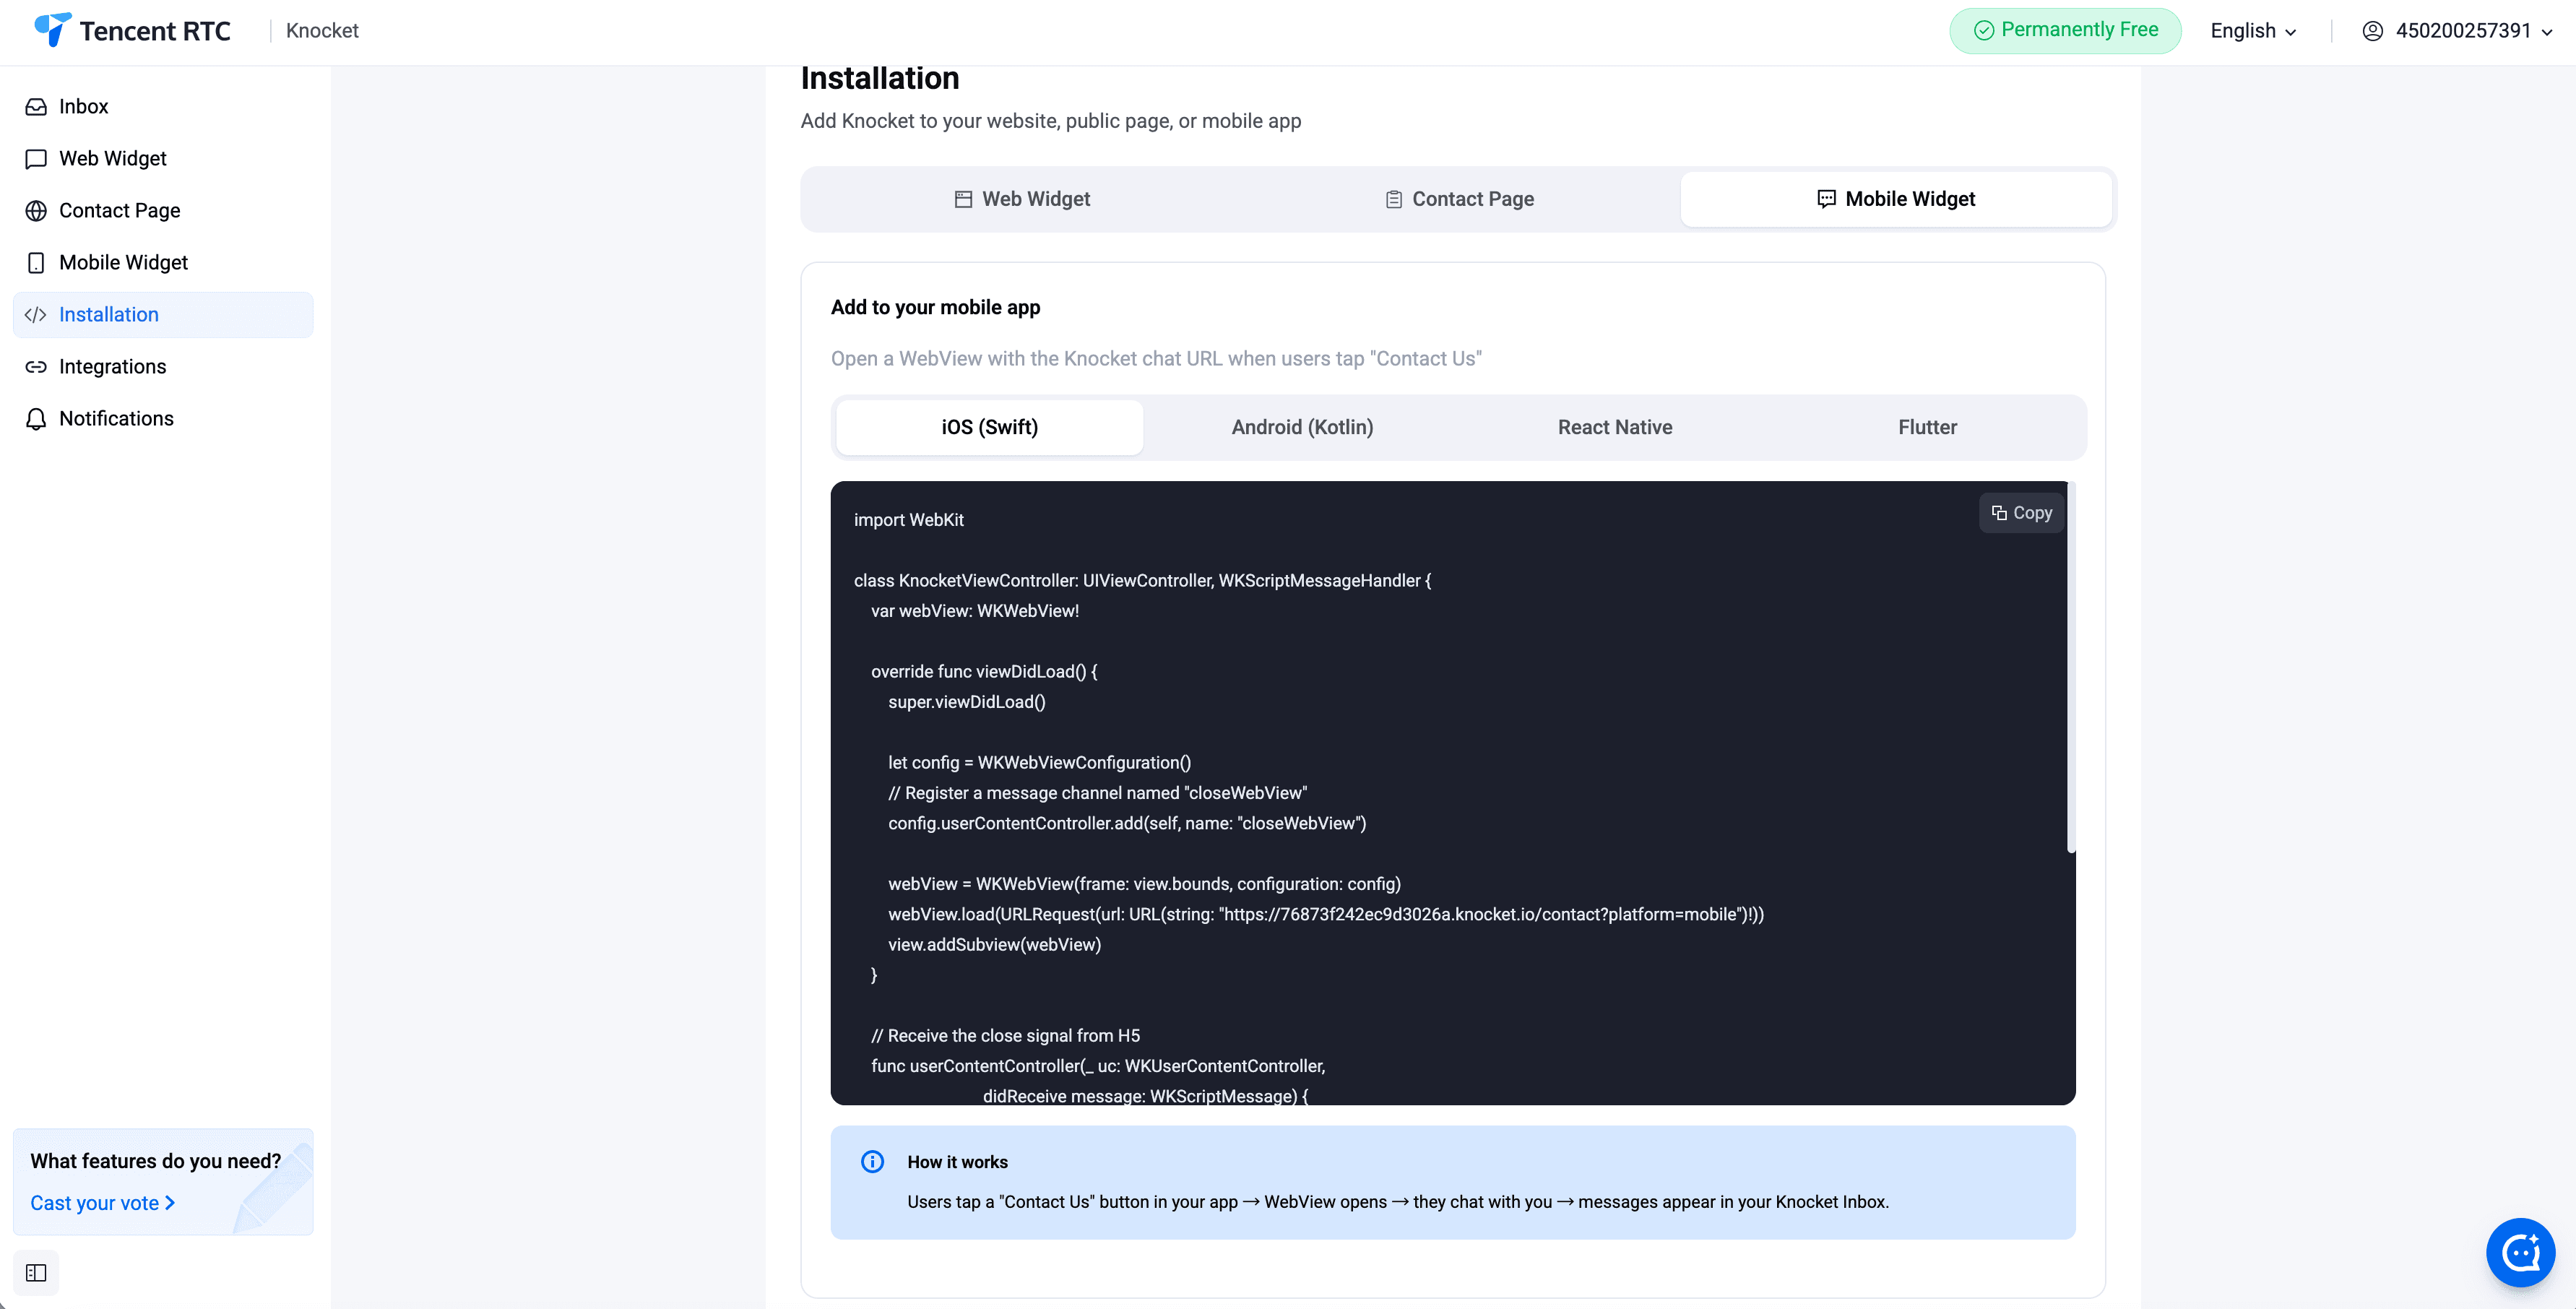
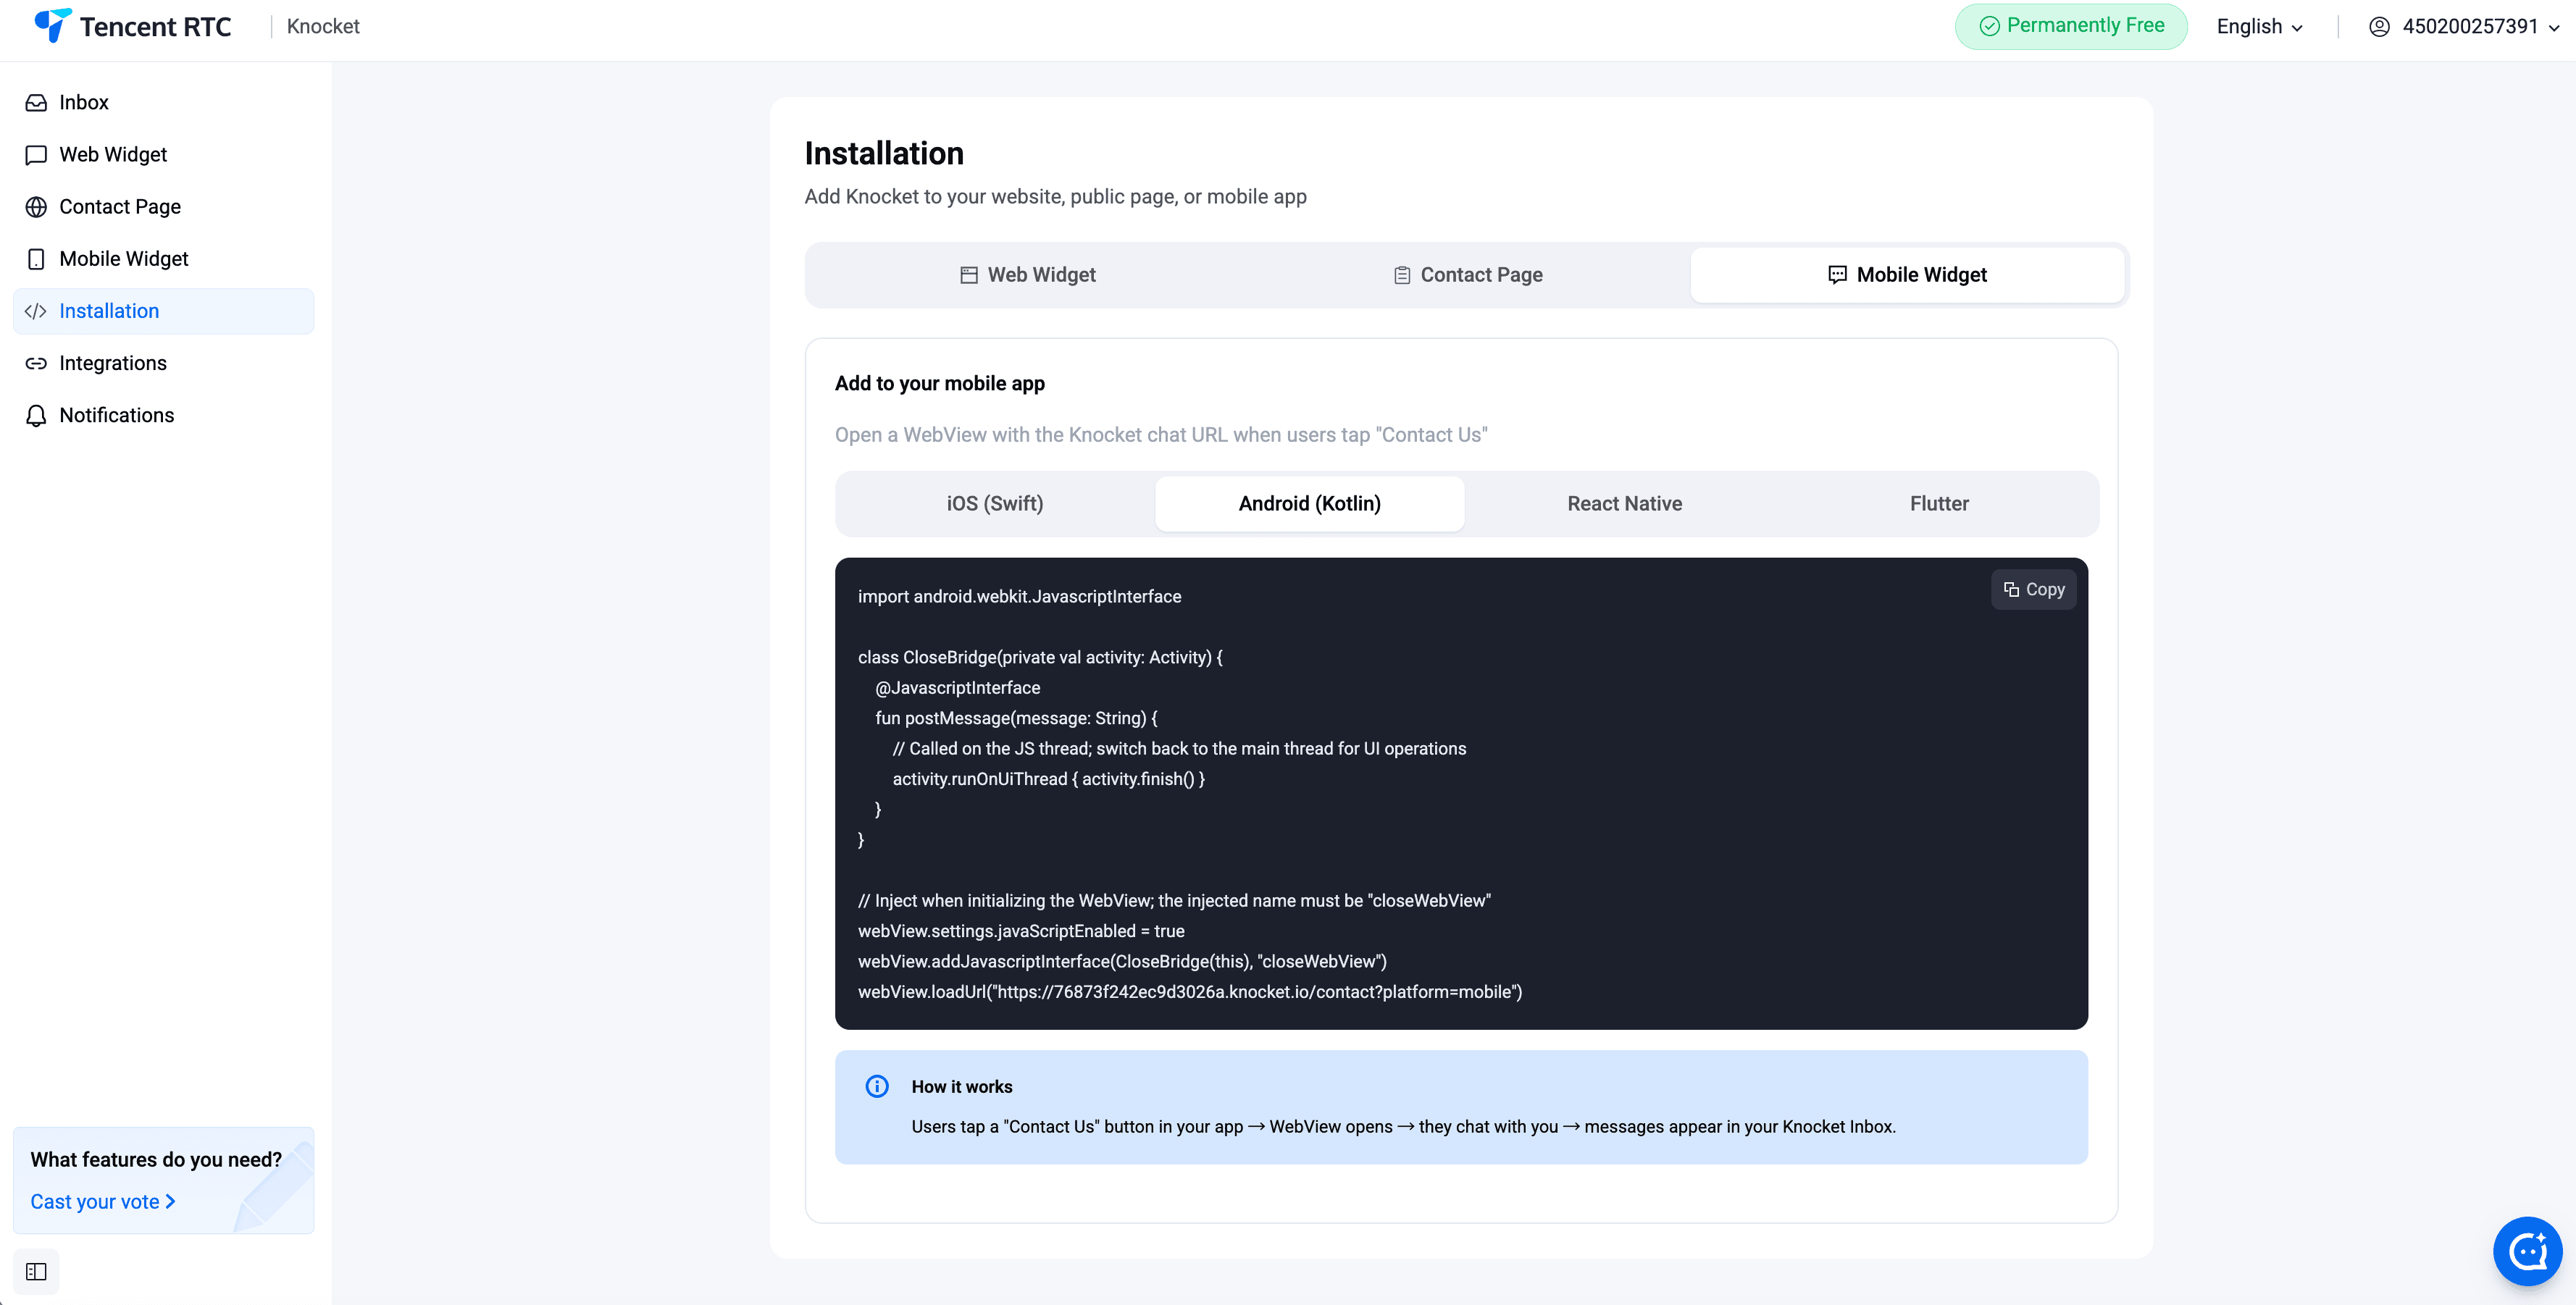
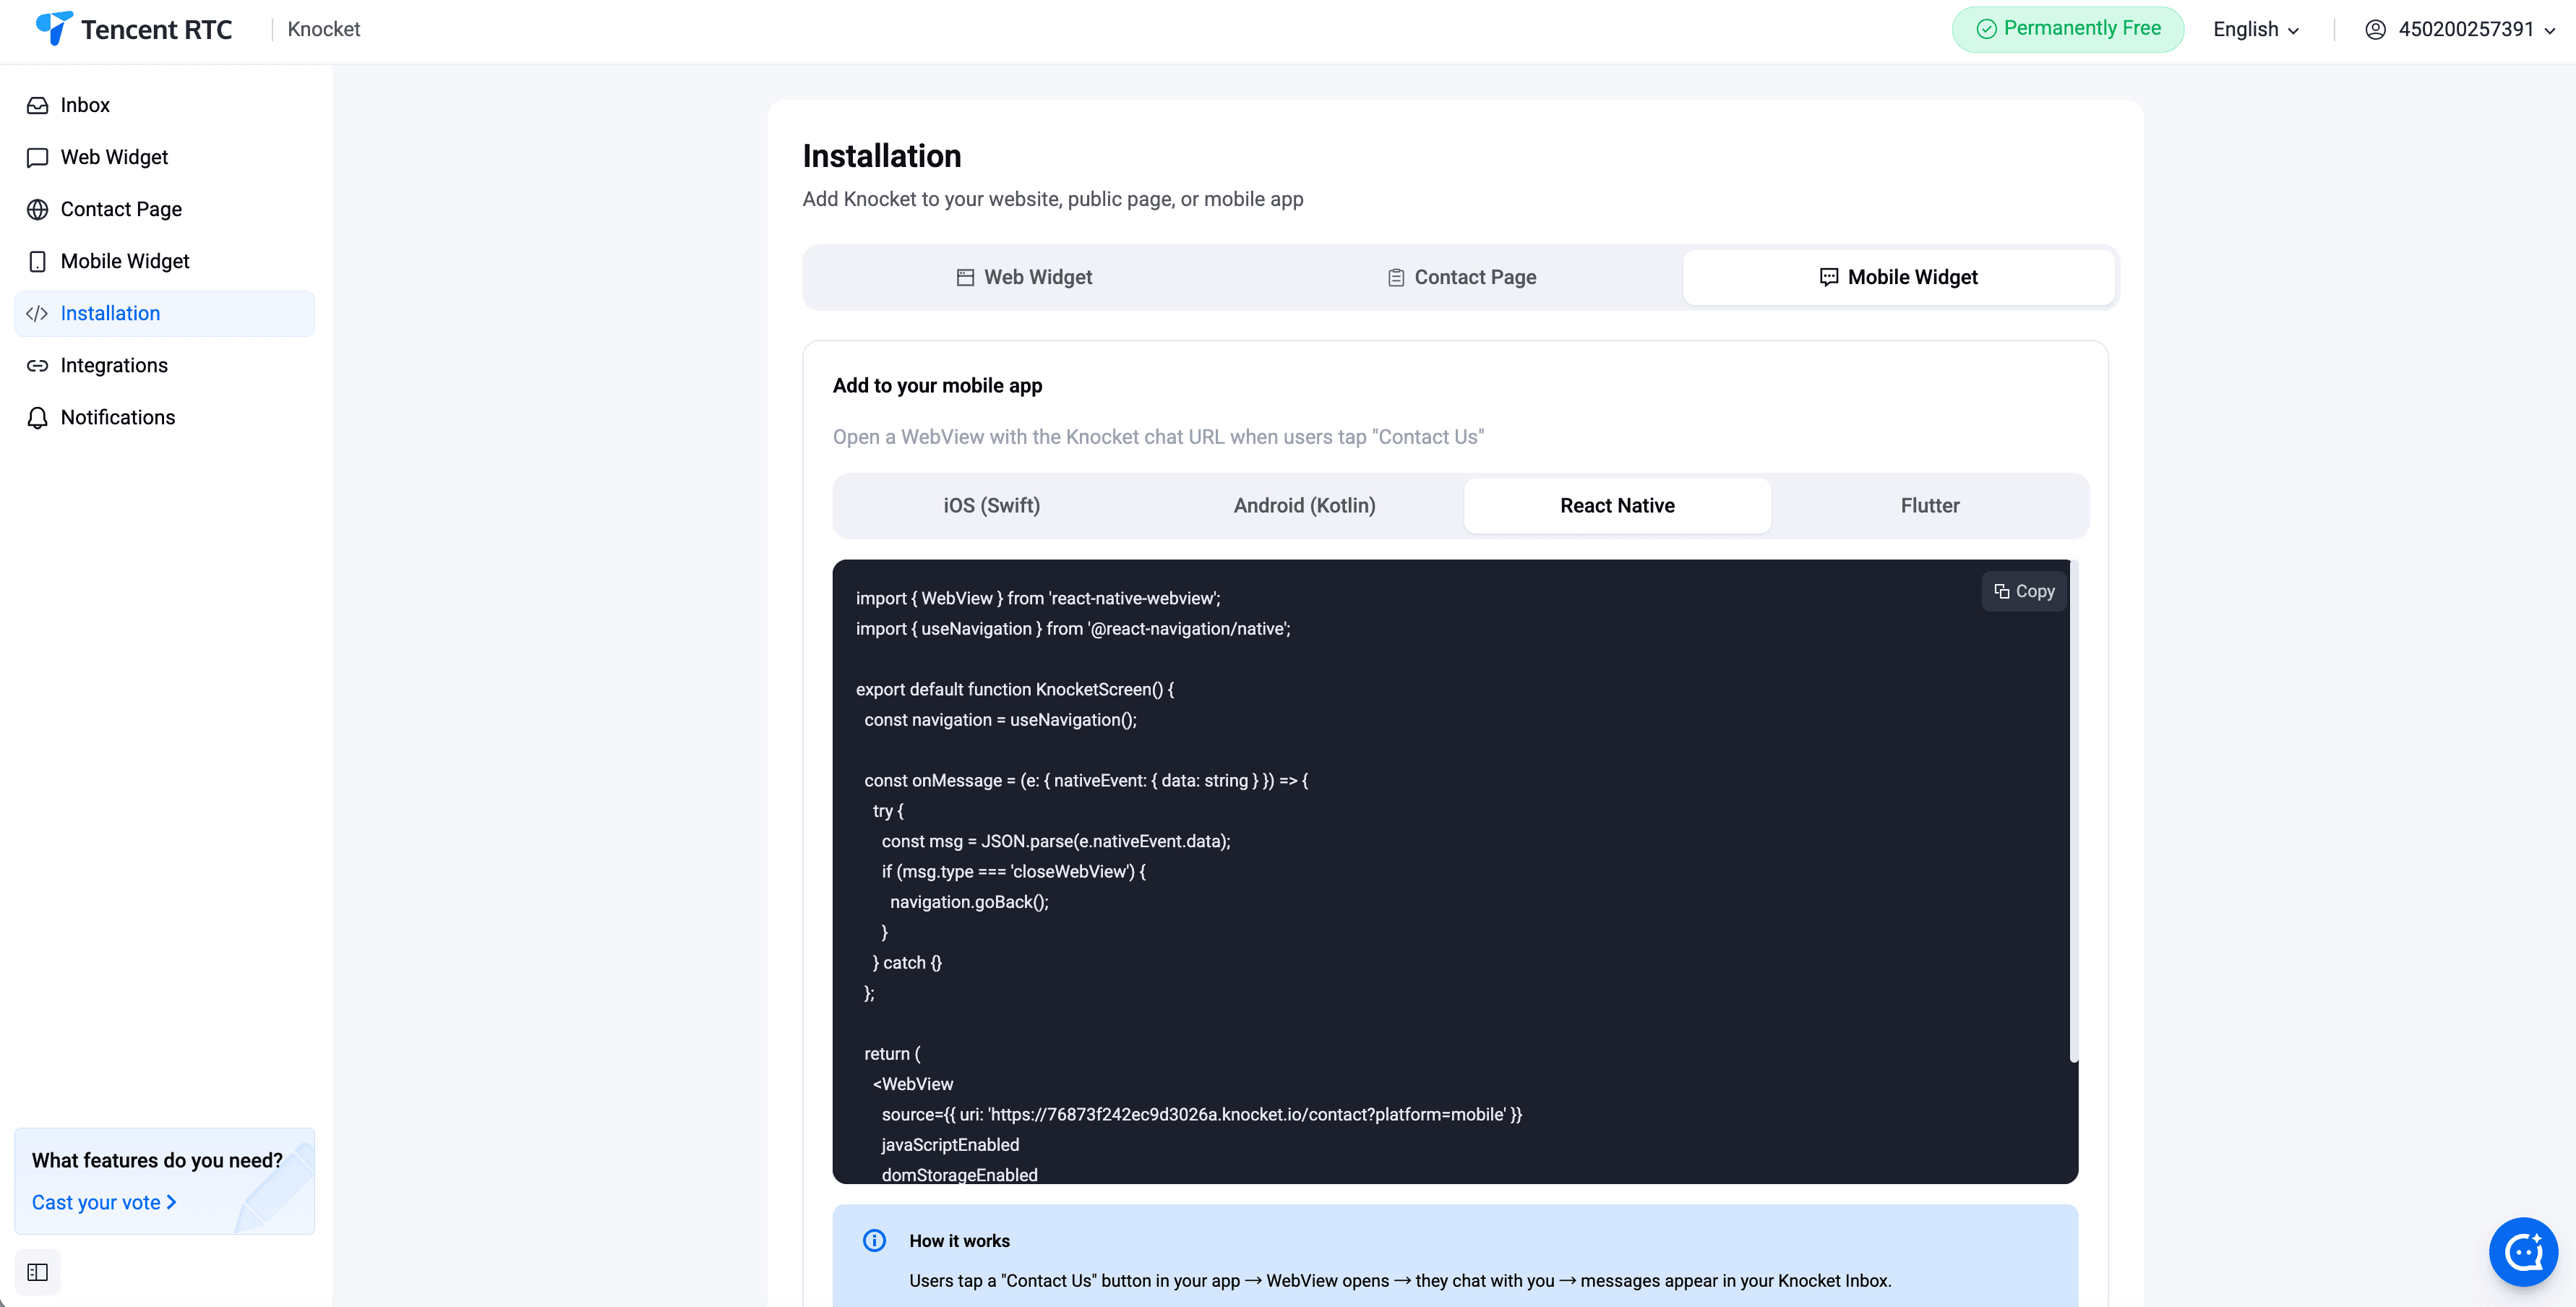
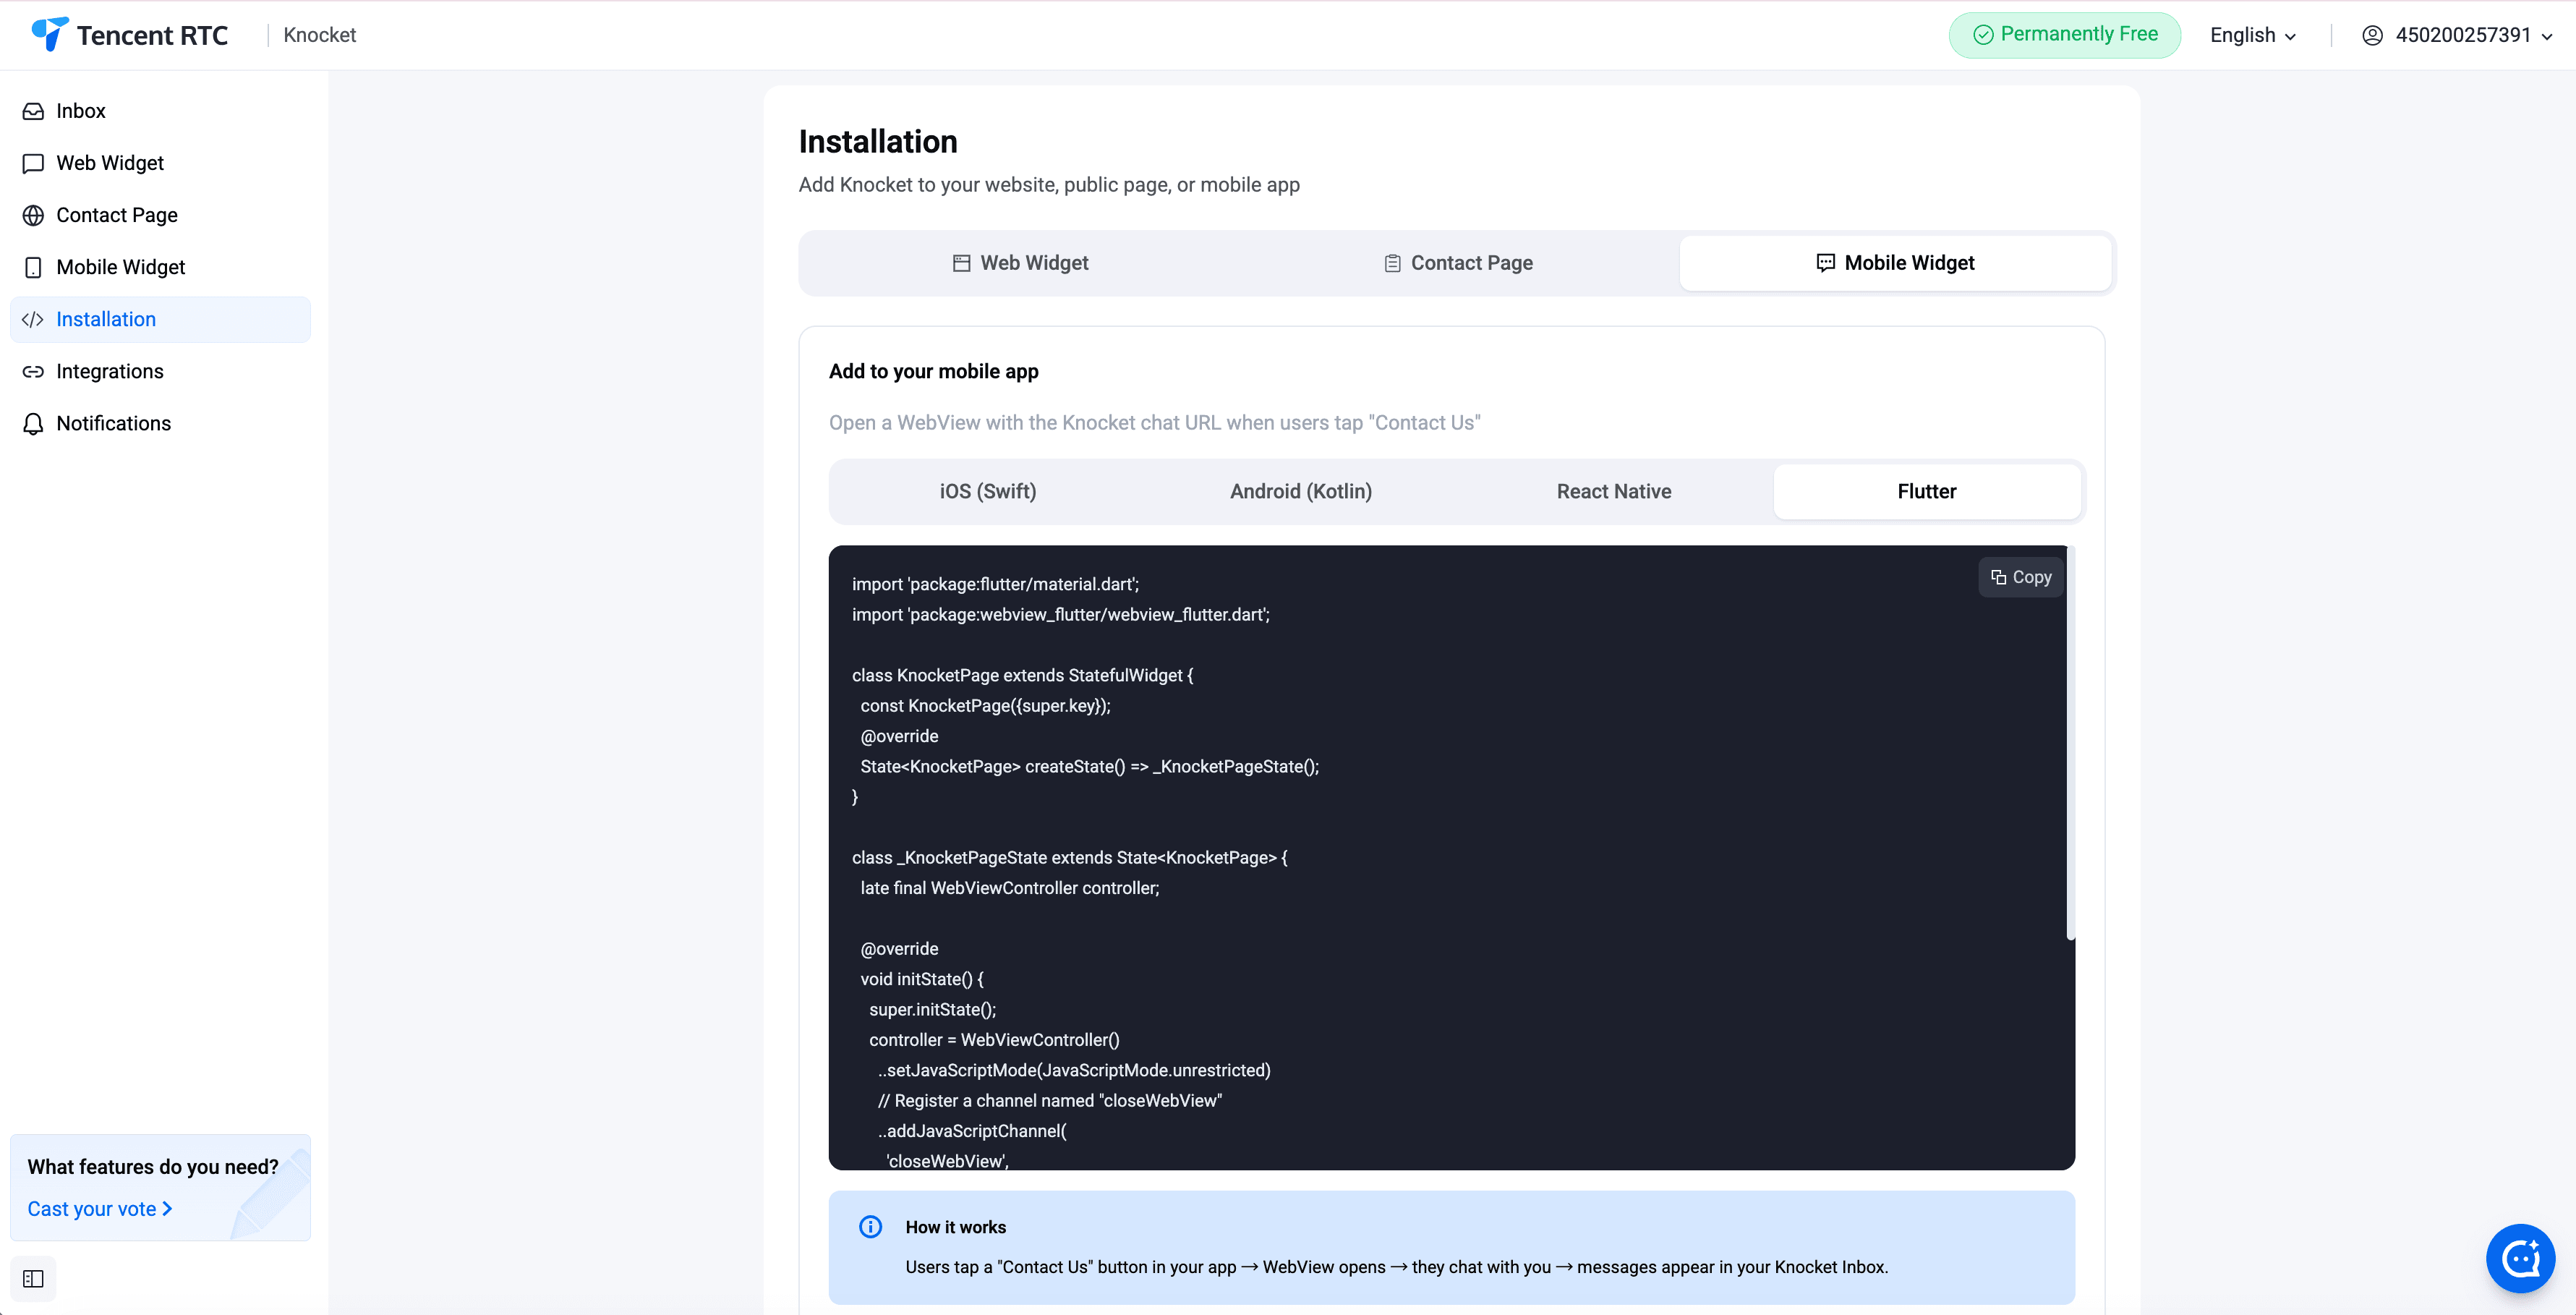
The mobile widget is a chat bubble that lives inside a native iOS, Android, React Native, or Flutter app. It uses the WebView approach — the widget loads the Knocket contact page inside an in-app webview and bridges native events back to Knocket. There is no native SDK to install and no per-platform chat UI to maintain.
iOS (Swift)
Load the Knocket contact page in a WKWebView. Attach a WKUserScript at document-start to inject the user's identity and app version. Handle the knocket: URL scheme to route events (widget opened, message sent, etc.) back to the native layer.
Android (Kotlin)
Load the Knocket contact page in a WebView. Call addJavascriptInterface to expose a native bridge for identity, version, and event callbacks. Use setWebChromeClient to handle attachment uploads from the widget.
React Native
Use the react-native-webview package. Post identity messages from JavaScript with postMessage. Listen to the onMessage callback on the WebView for events flowing back from the widget.
Flutter
Use the webview_flutter package. Register a JavaScript channel with addJavaScriptChannel. Post identity and version on channel initialization, then listen for message events.
The unified inbox
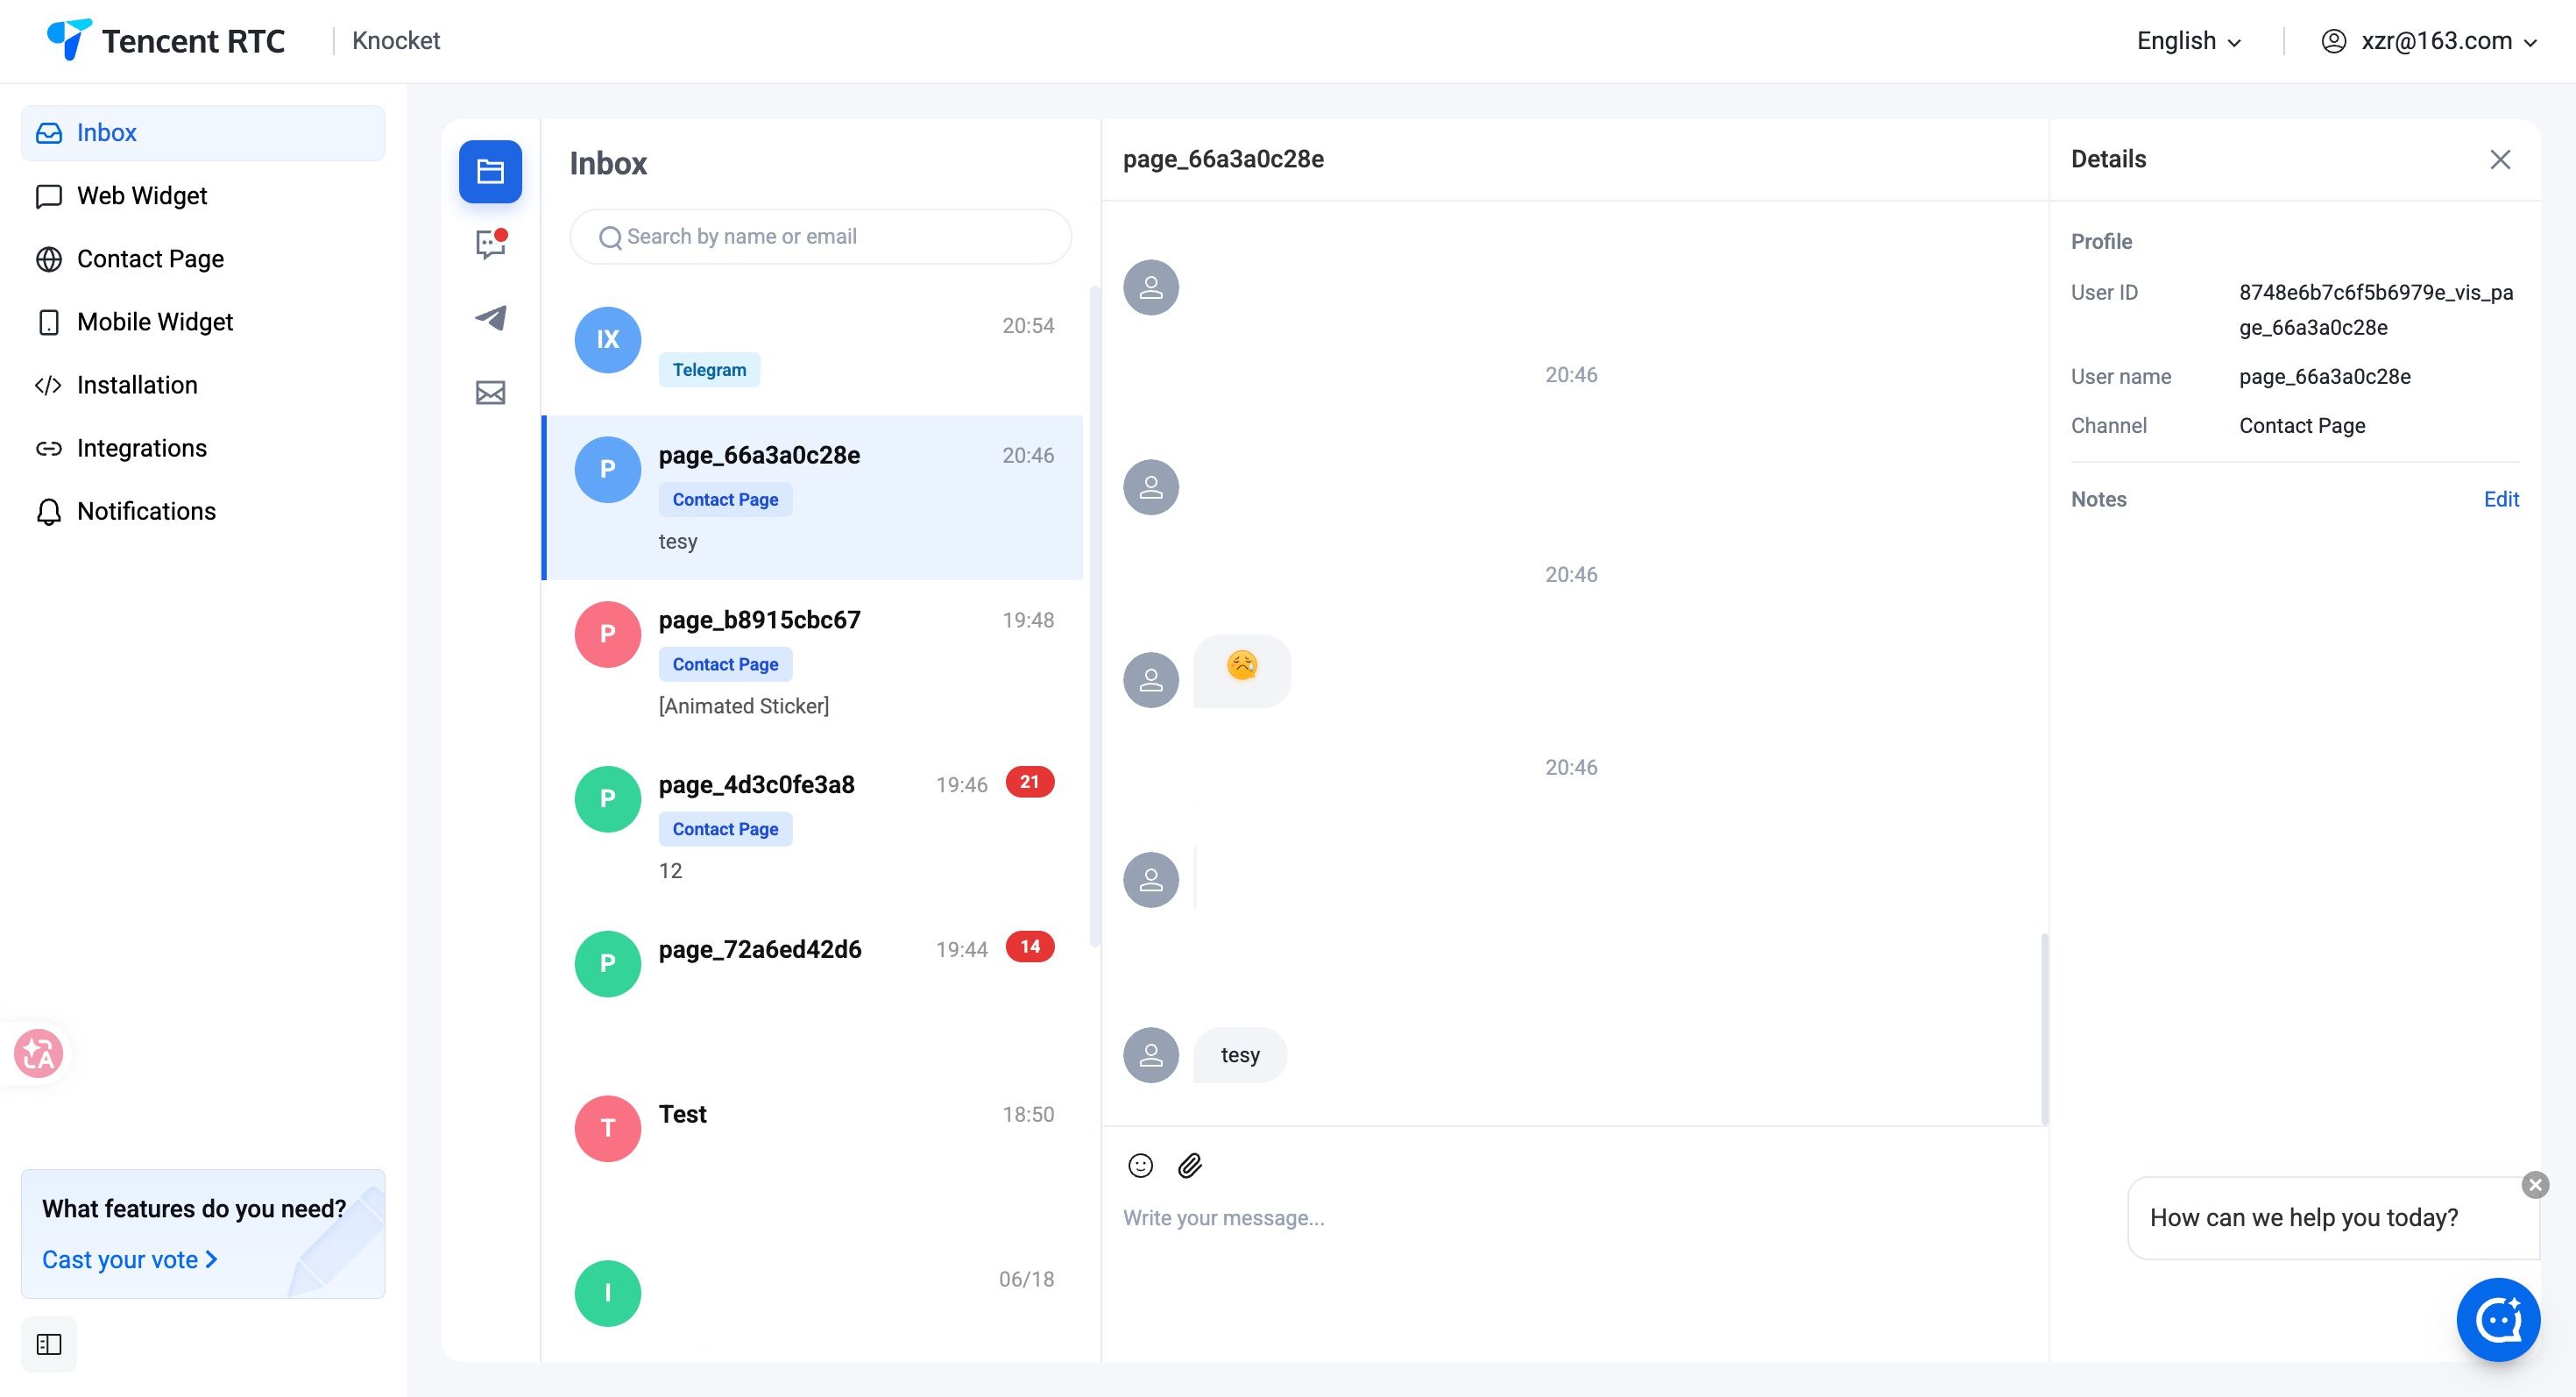
Messages from every form — web widget, contact page, mobile widget — converge in a single Knocket inbox in the console. Replies to any message route back to the visitor on their original channel. A visitor who opened a chat on the web widget receives your reply in the same web widget. A visitor who messaged from a mobile app receives it in the app. No manual channel switching.
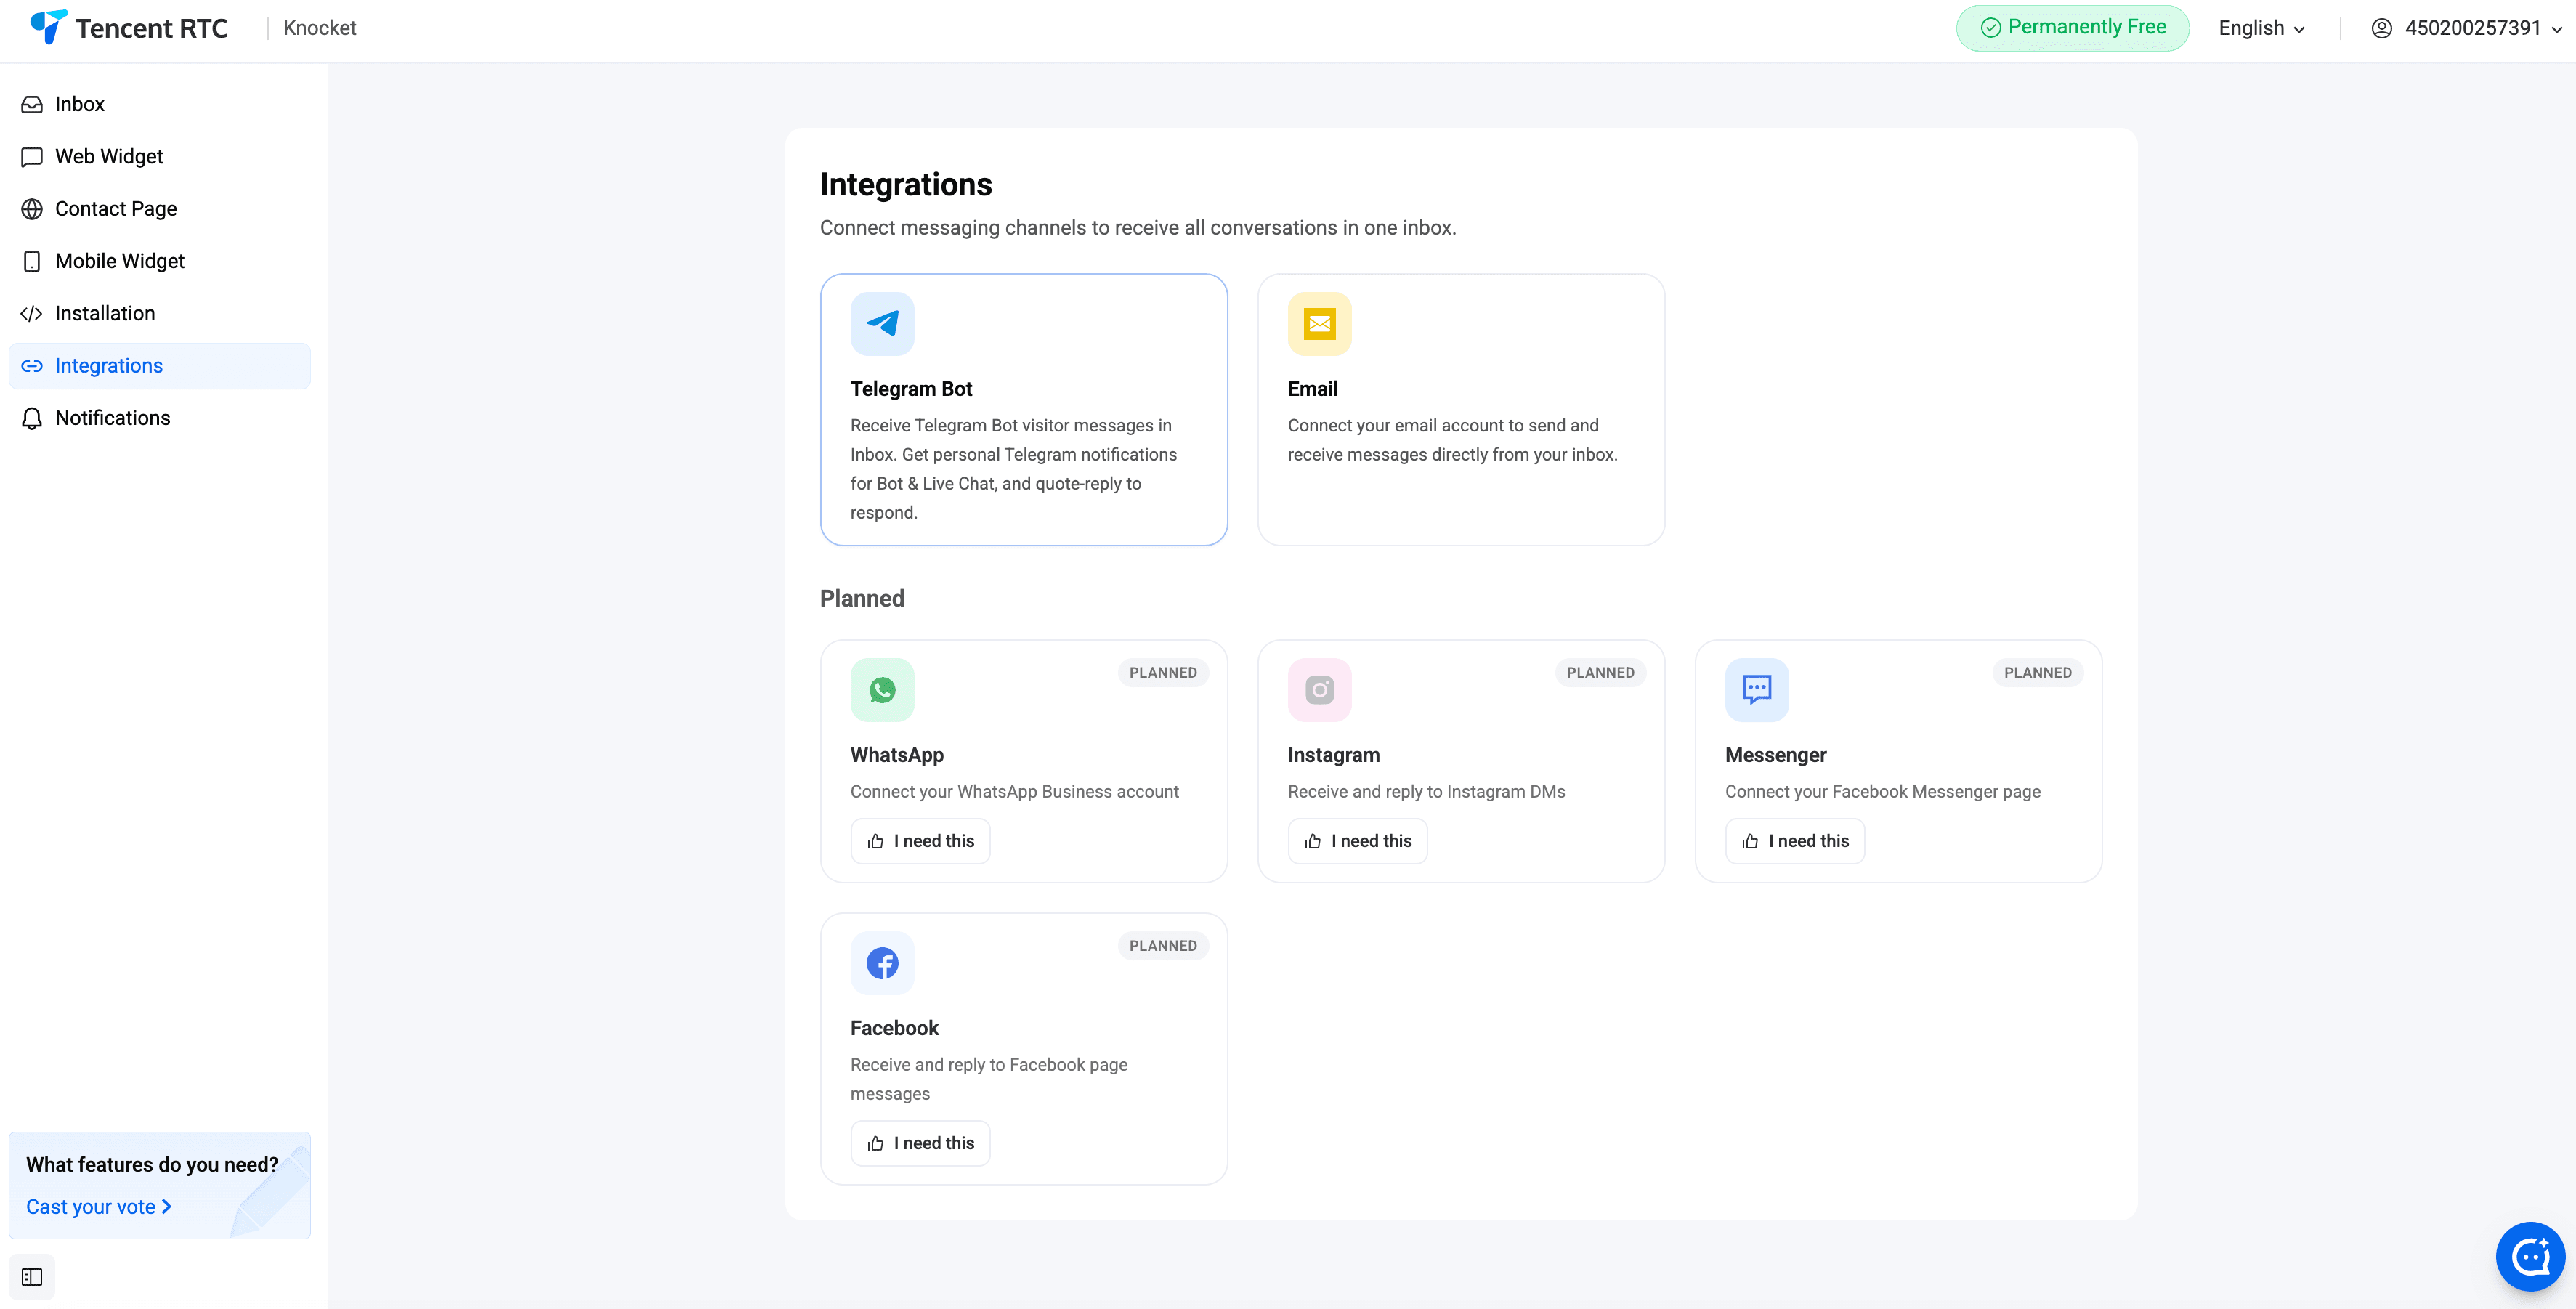
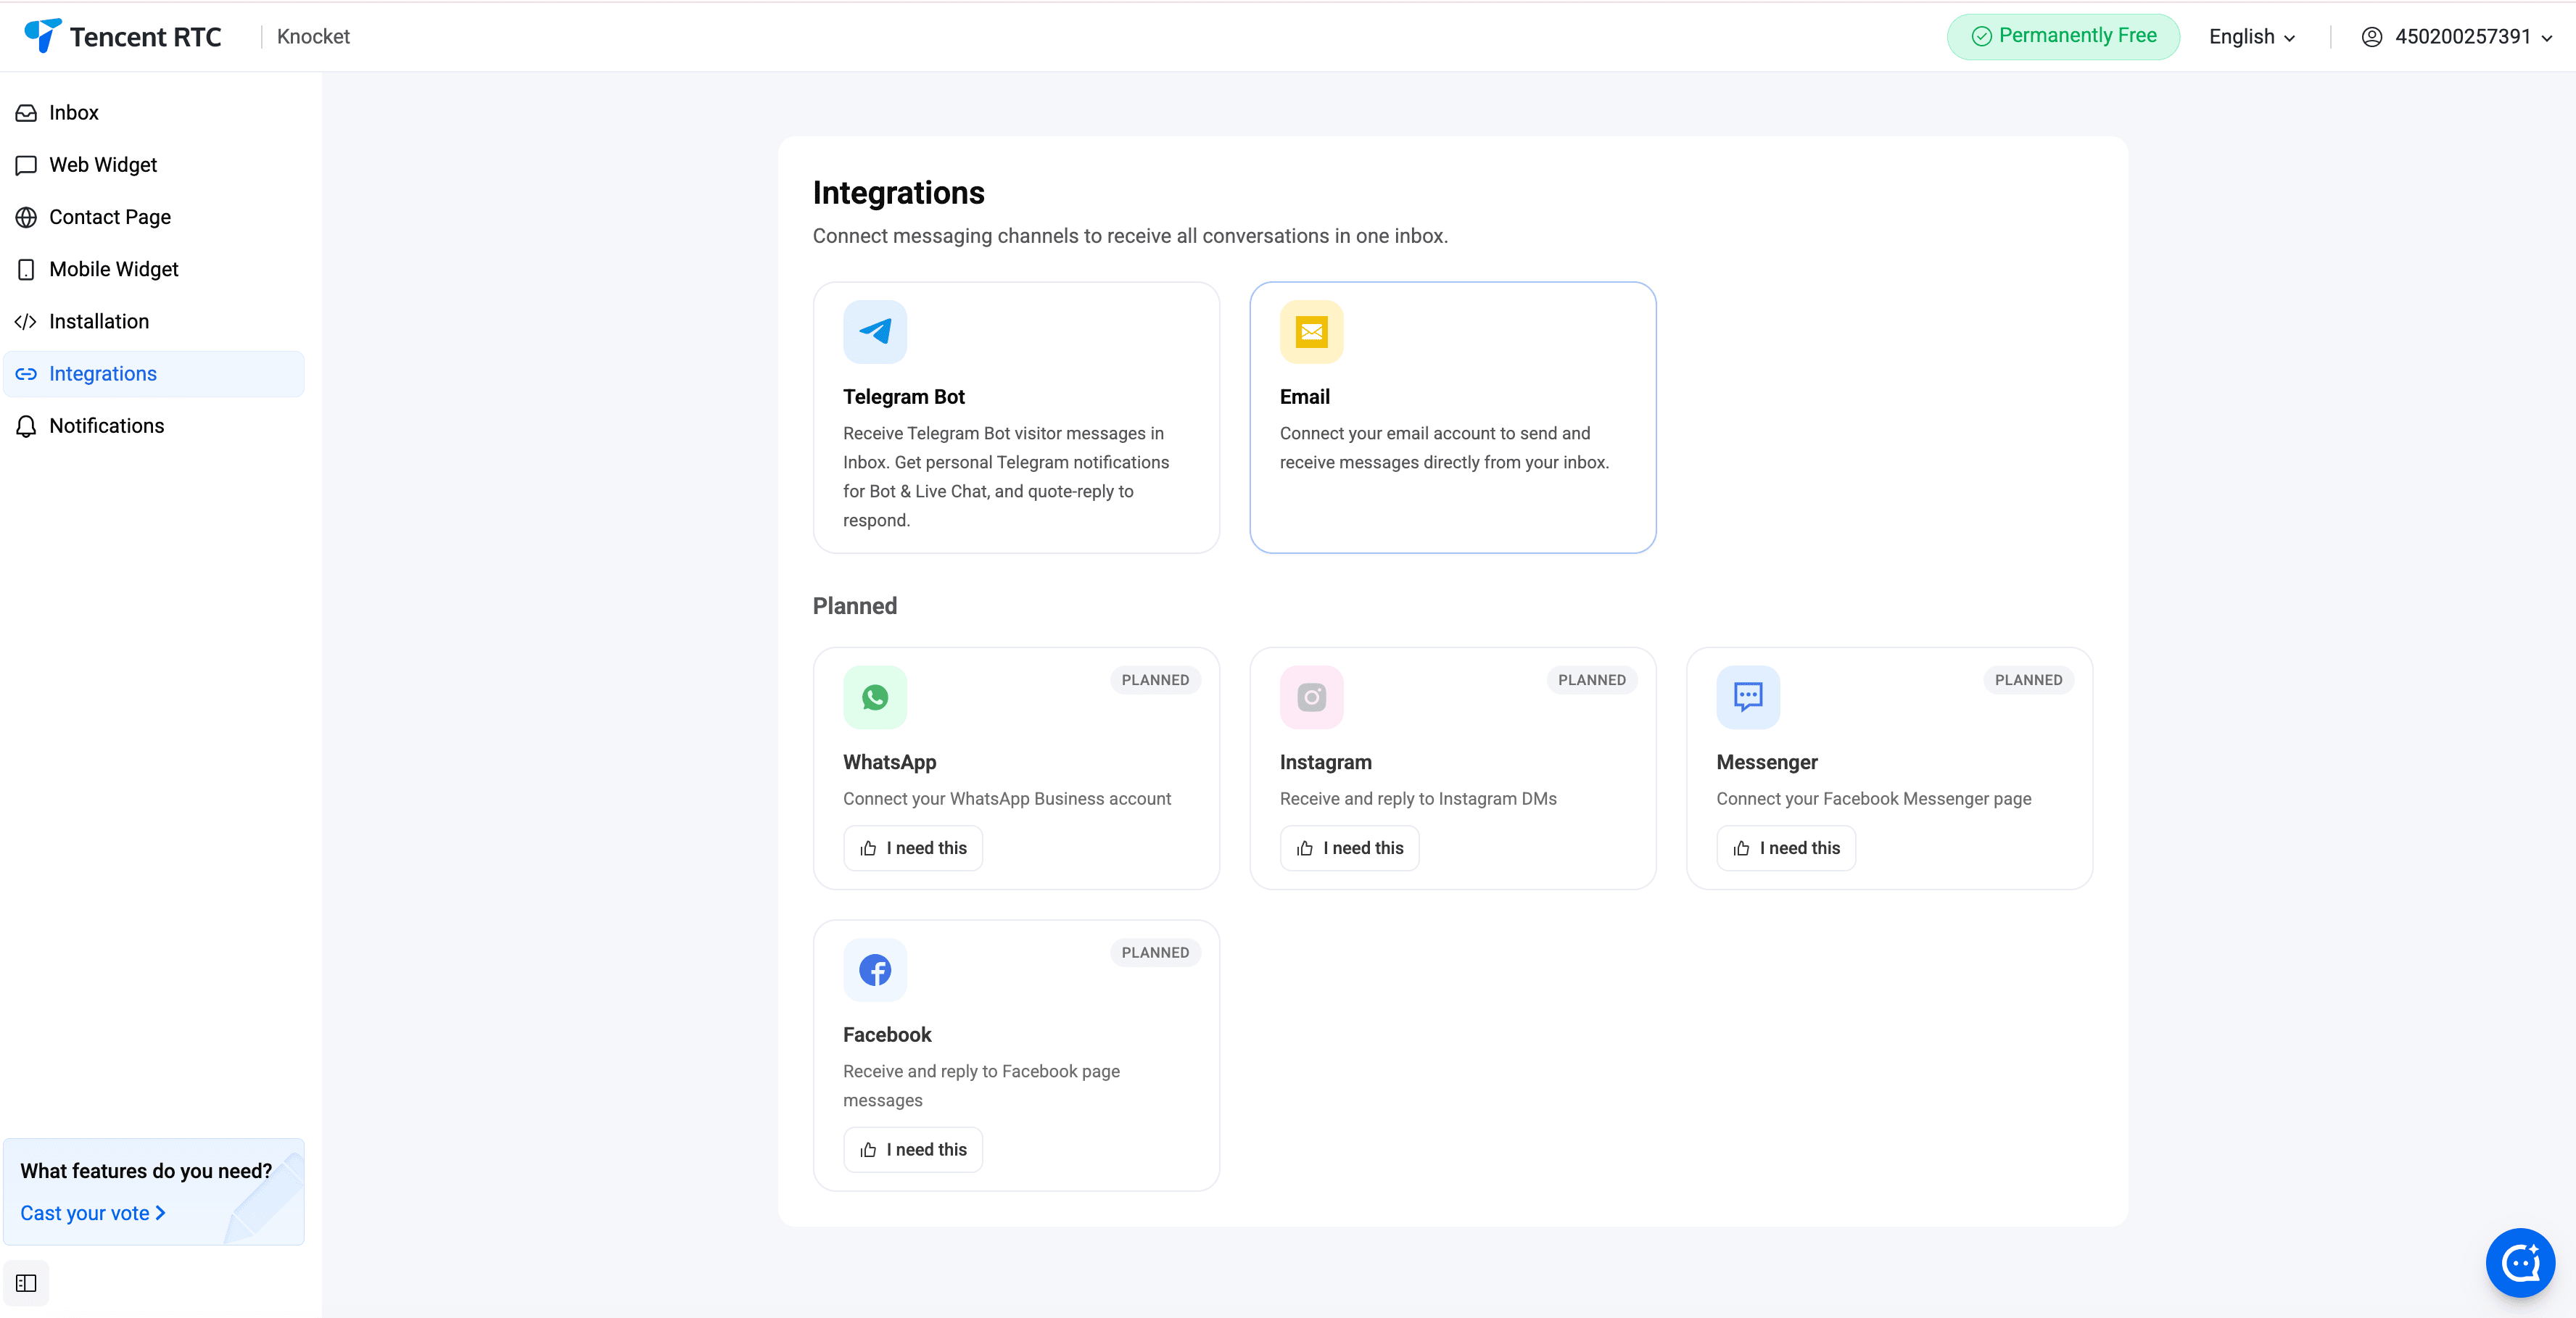
The unified inbox also merges in Telegram and email — messages sent to your Knocket-connected Telegram Bot or your Knocket email alias appear as threads alongside chat messages. Quote-reply from Telegram to answer a chat message, or answer from the console.
Channel integrations
Telegram
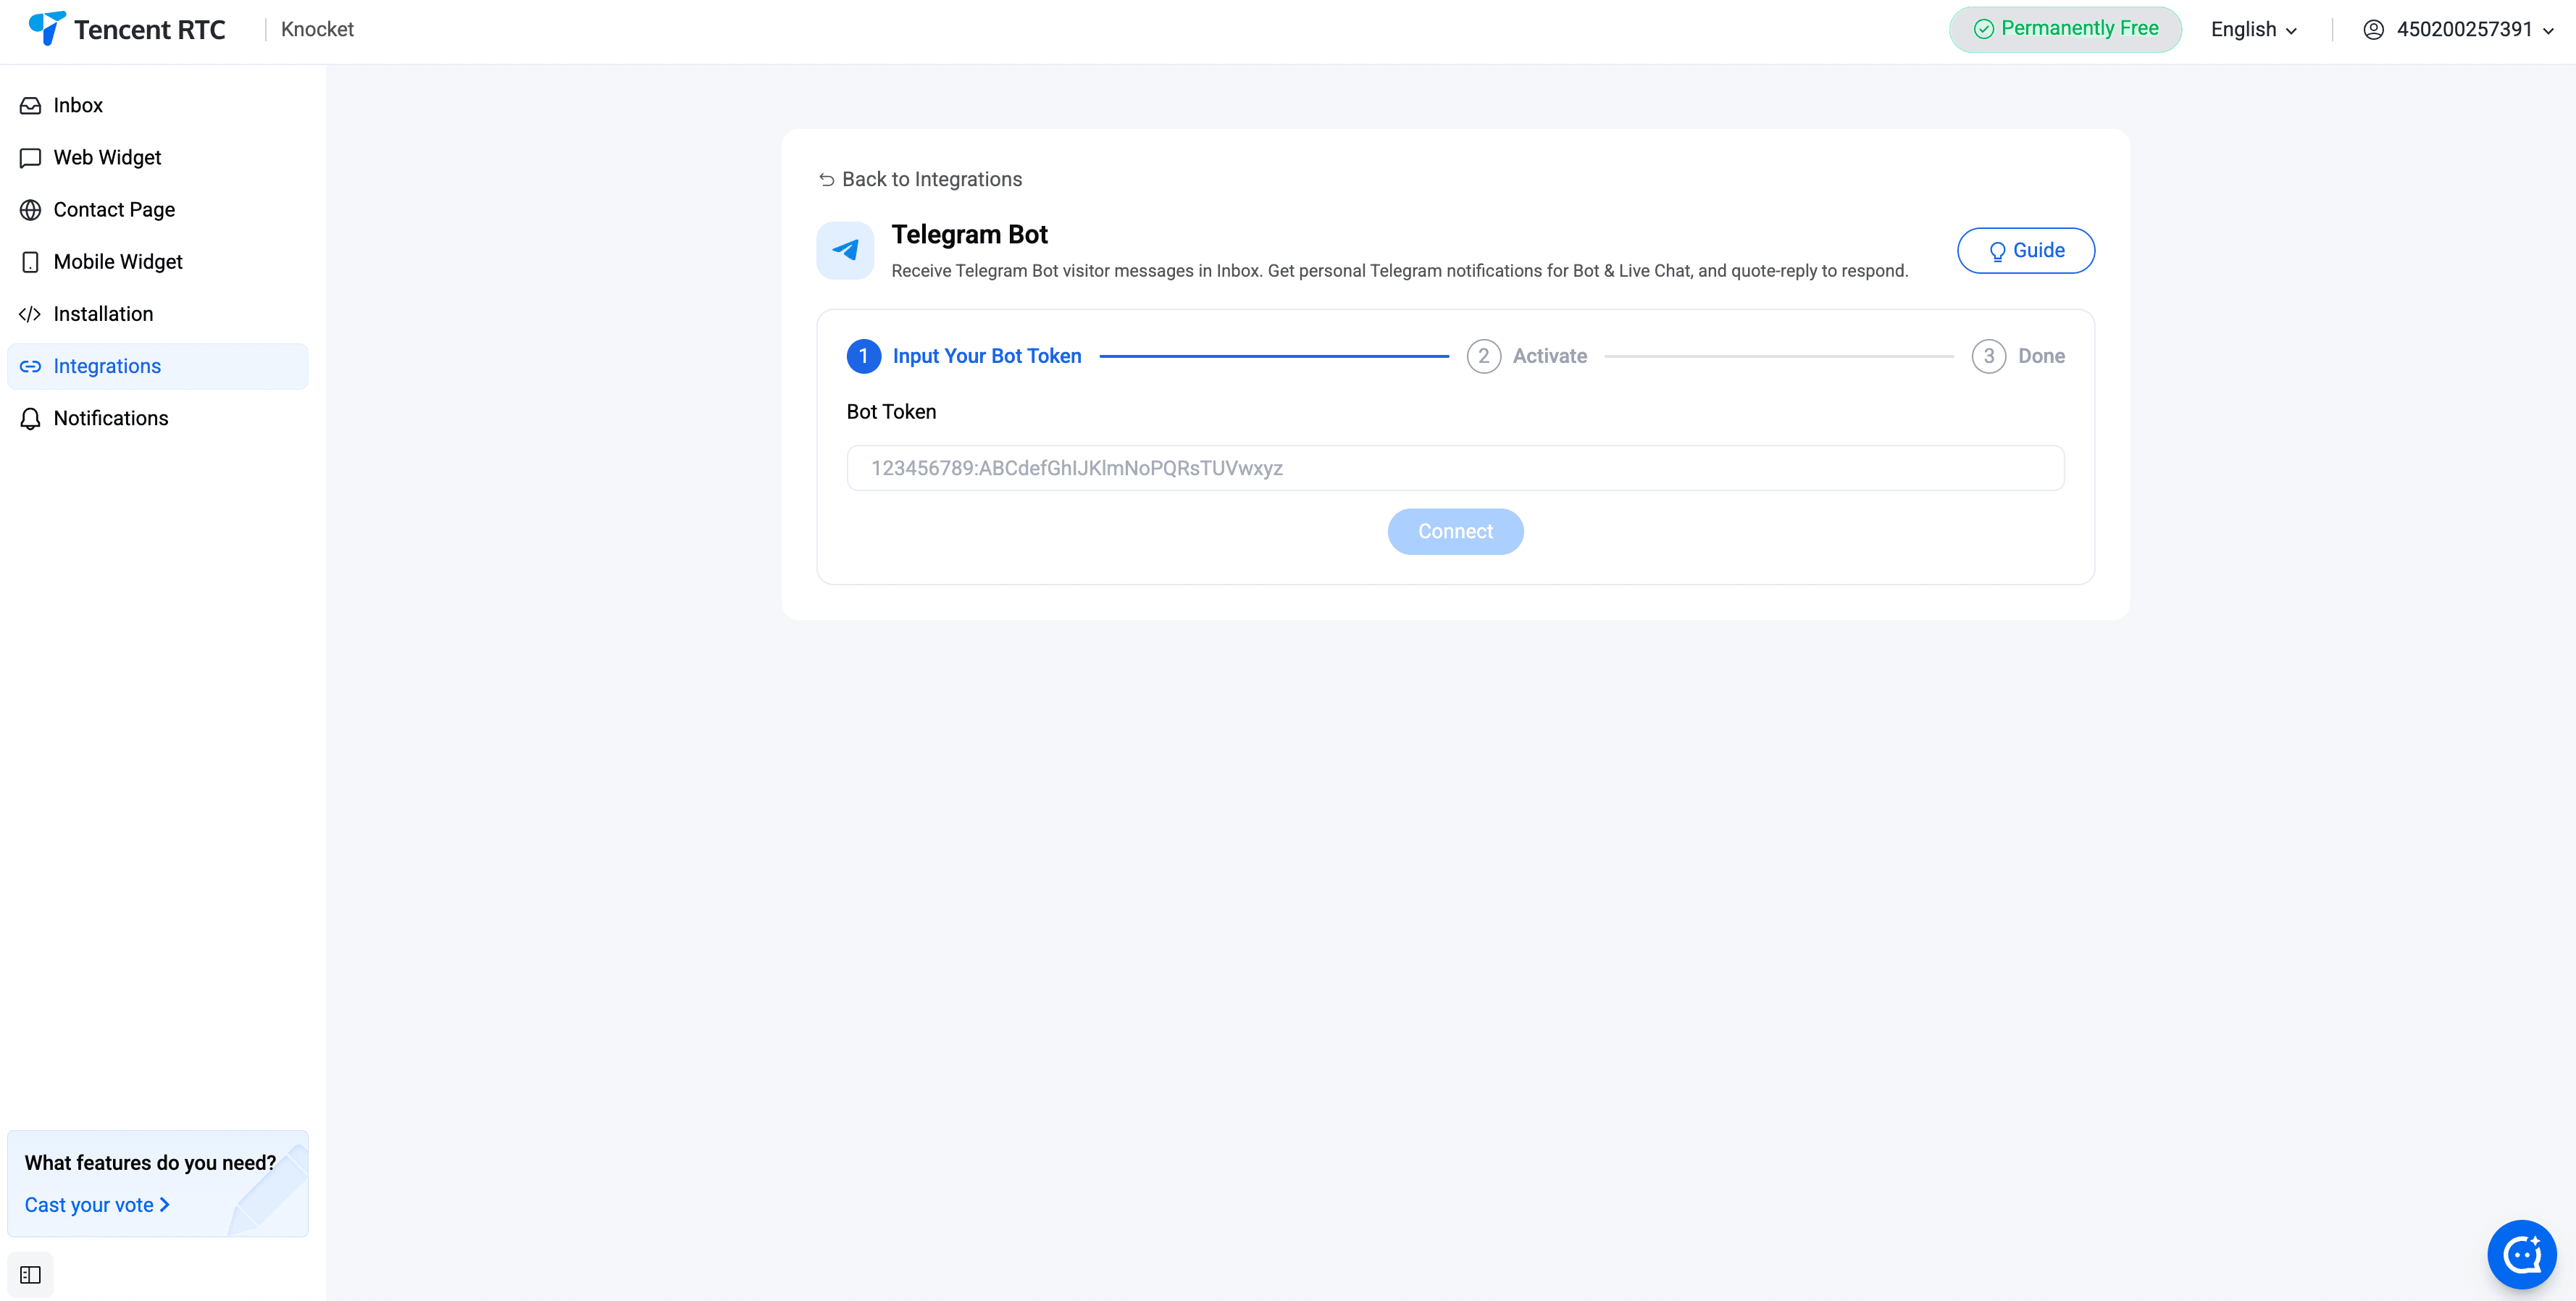
Create a new bot with @BotFather on Telegram. Copy the bot token. Paste it into Knocket console → Integrations → Telegram. Every visitor message now pings the bot; quote-reply in the bot chat to answer, and your reply lands back on the visitor's screen.
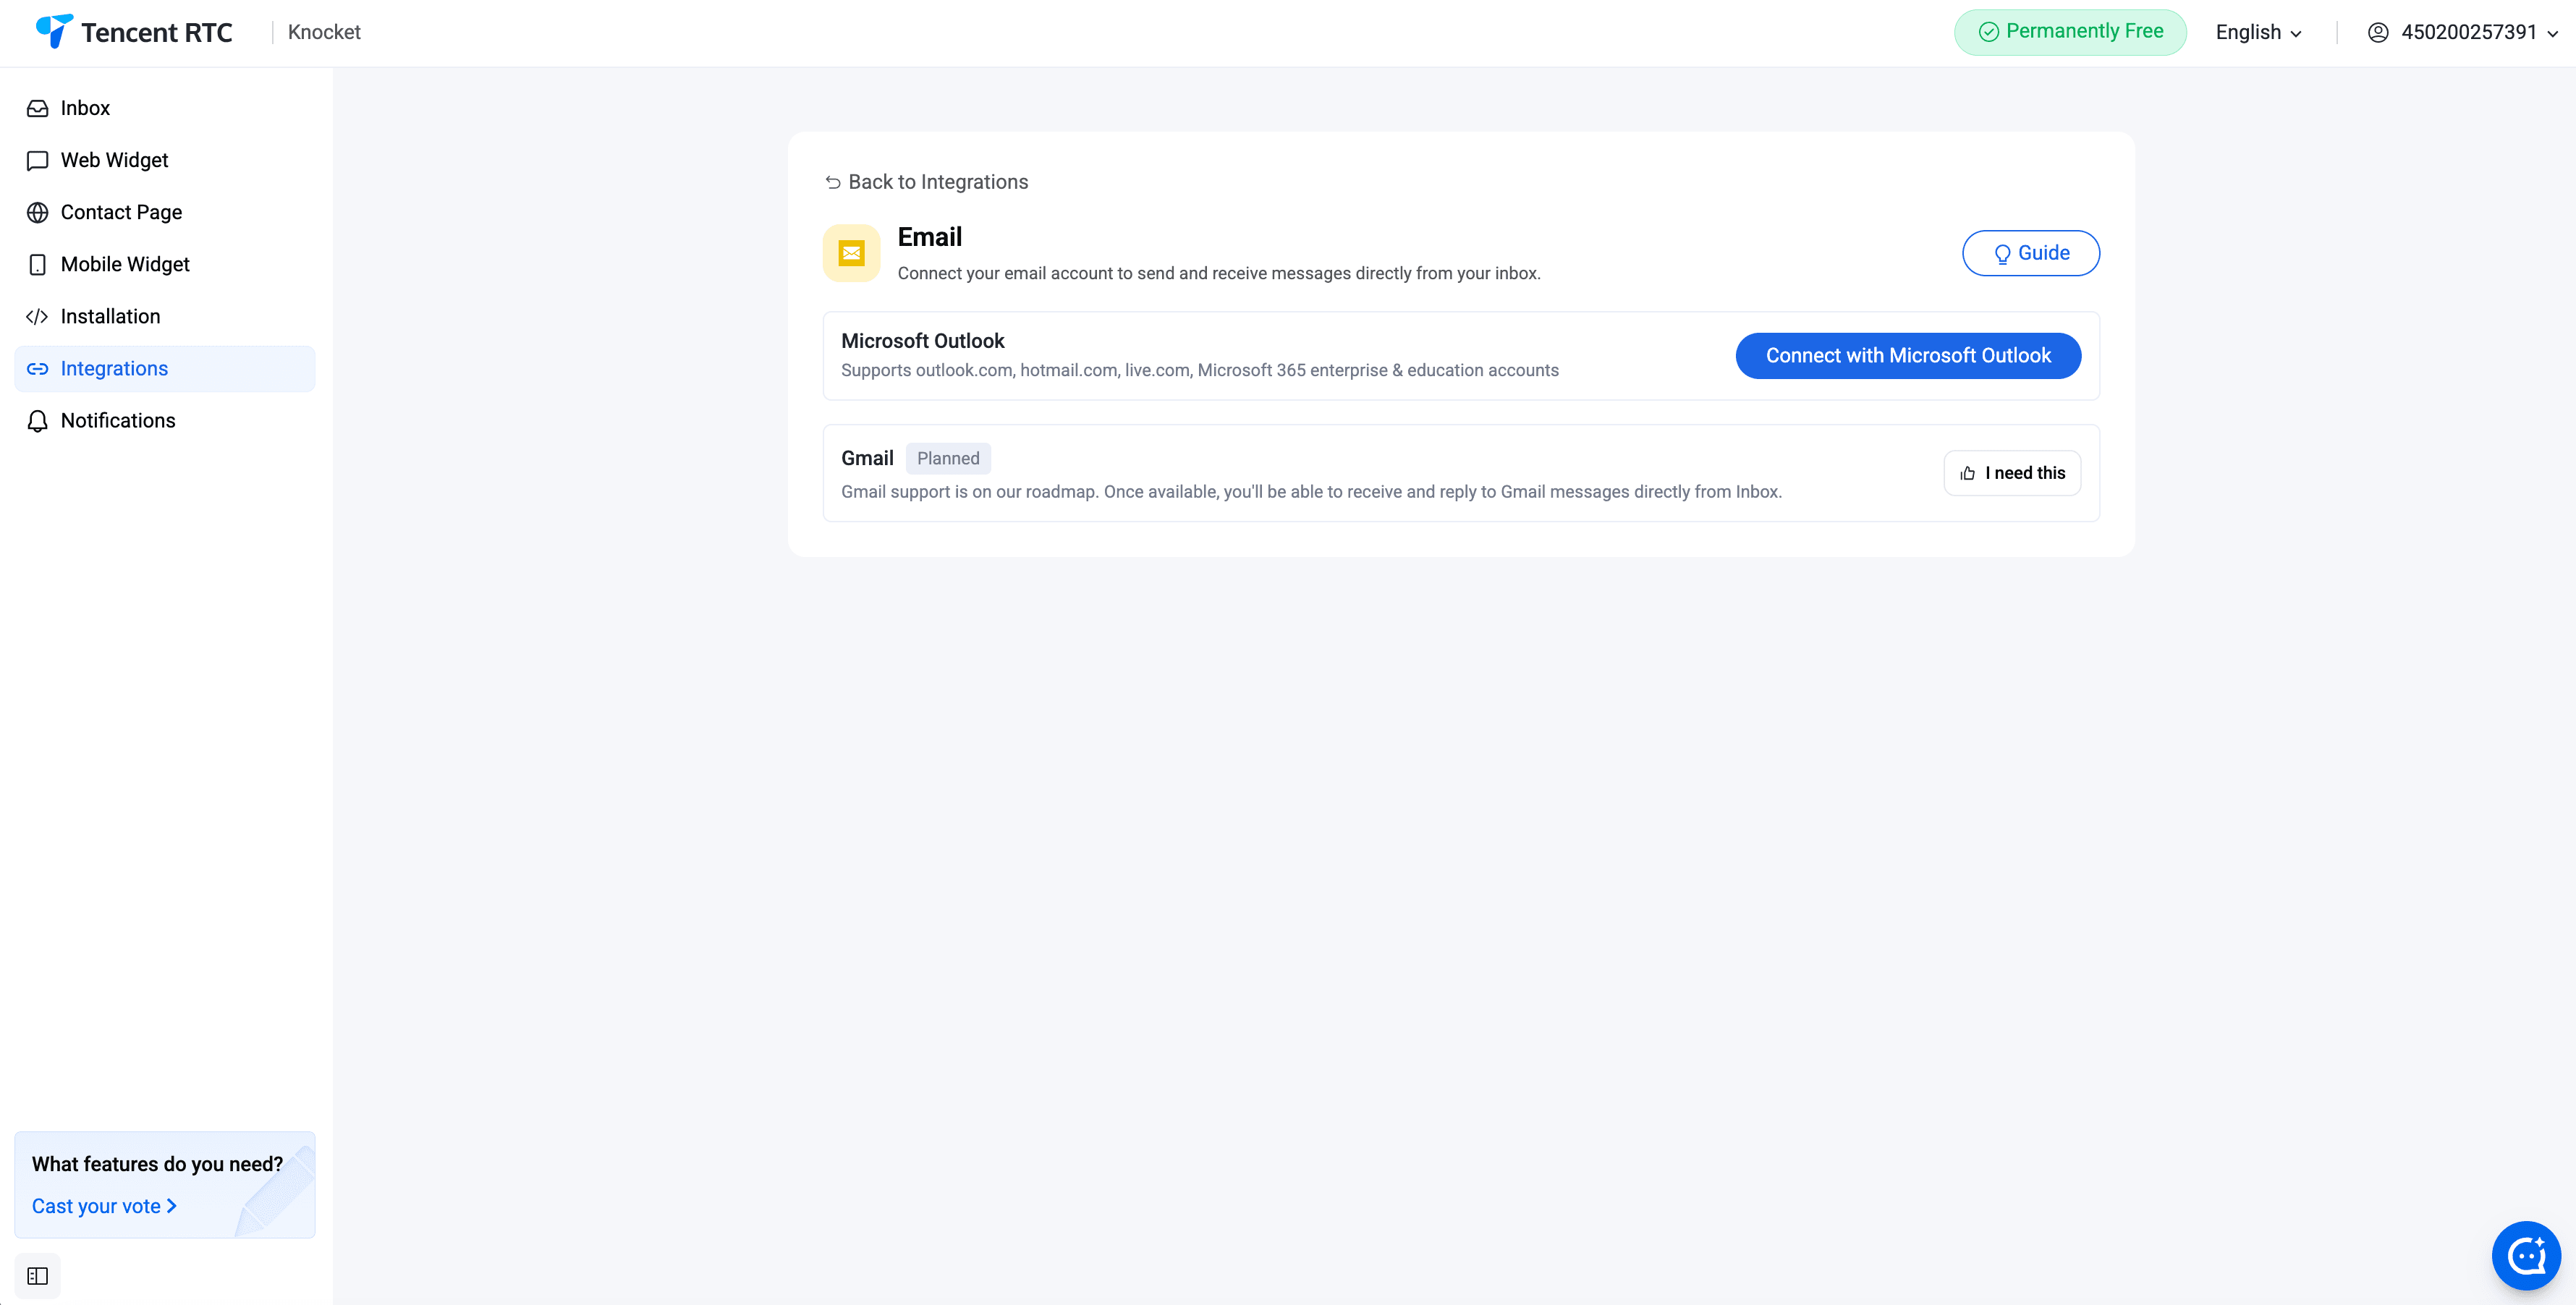
Email
Knocket supports two options: a Knocket-managed email address (an alias like hello.you@knocket.com) or a custom domain (set MX records to point to Knocket). Inbound emails become threads in the unified inbox alongside chat messages.
Ready to try Knocket?
60 seconds. No card. Free forever.
Start Free